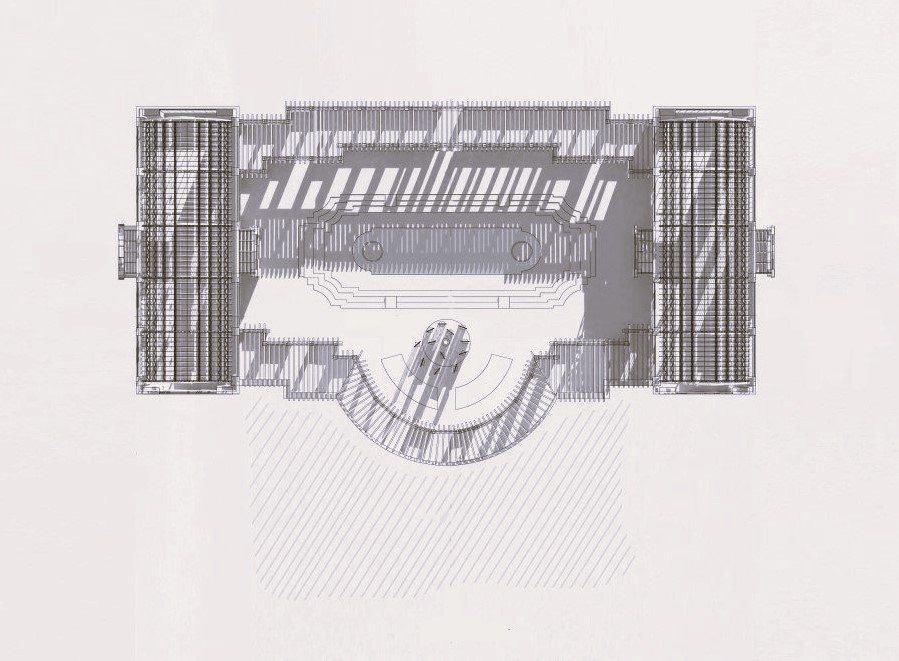
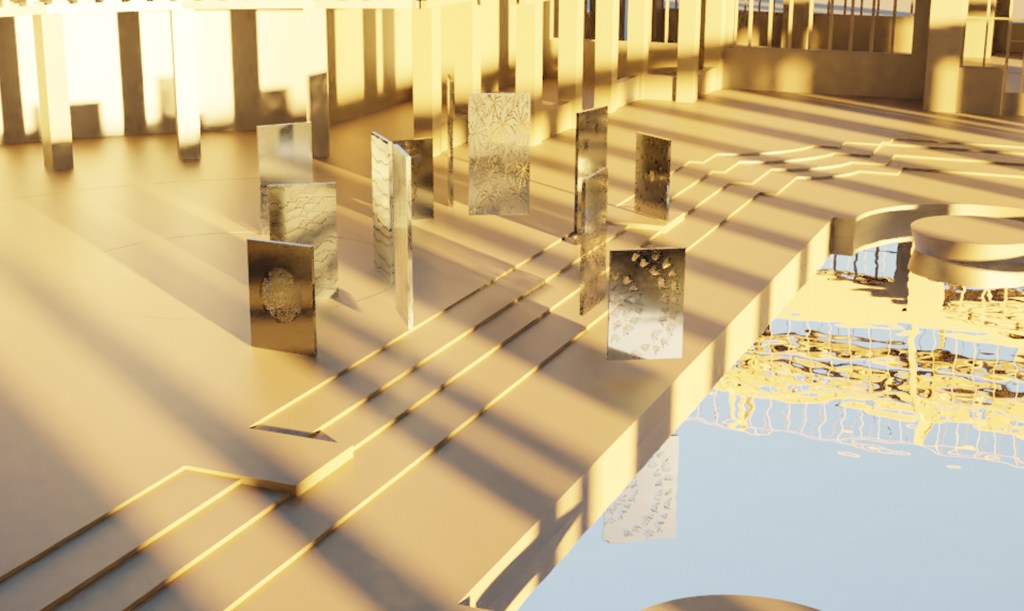
I created an exhibition space, inside the Winter Gardens at Auckland Domain. I have produced an interactive intervention that focuses on using shadow and light to join the disconnected plant life.
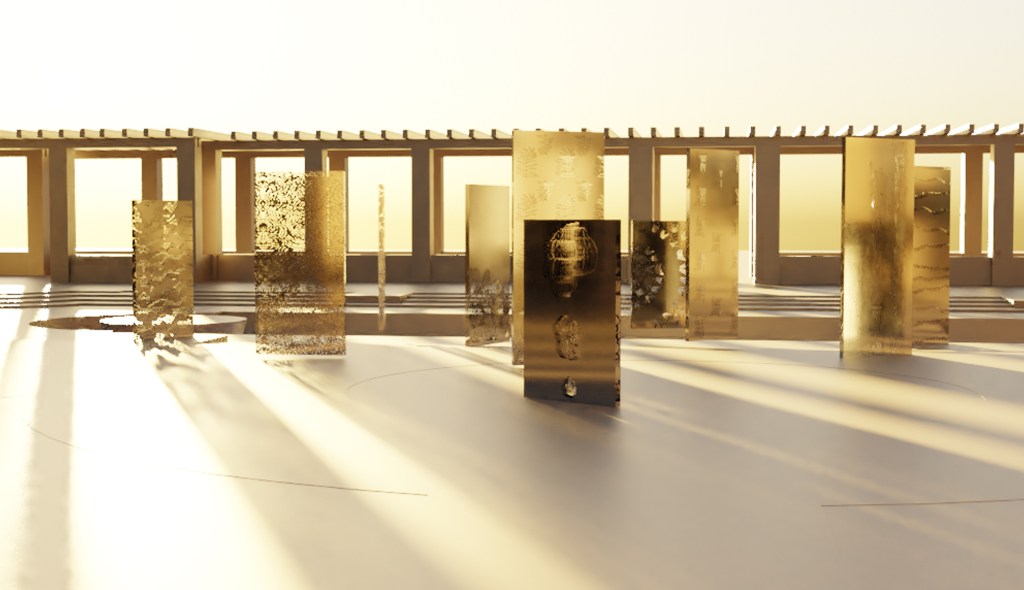
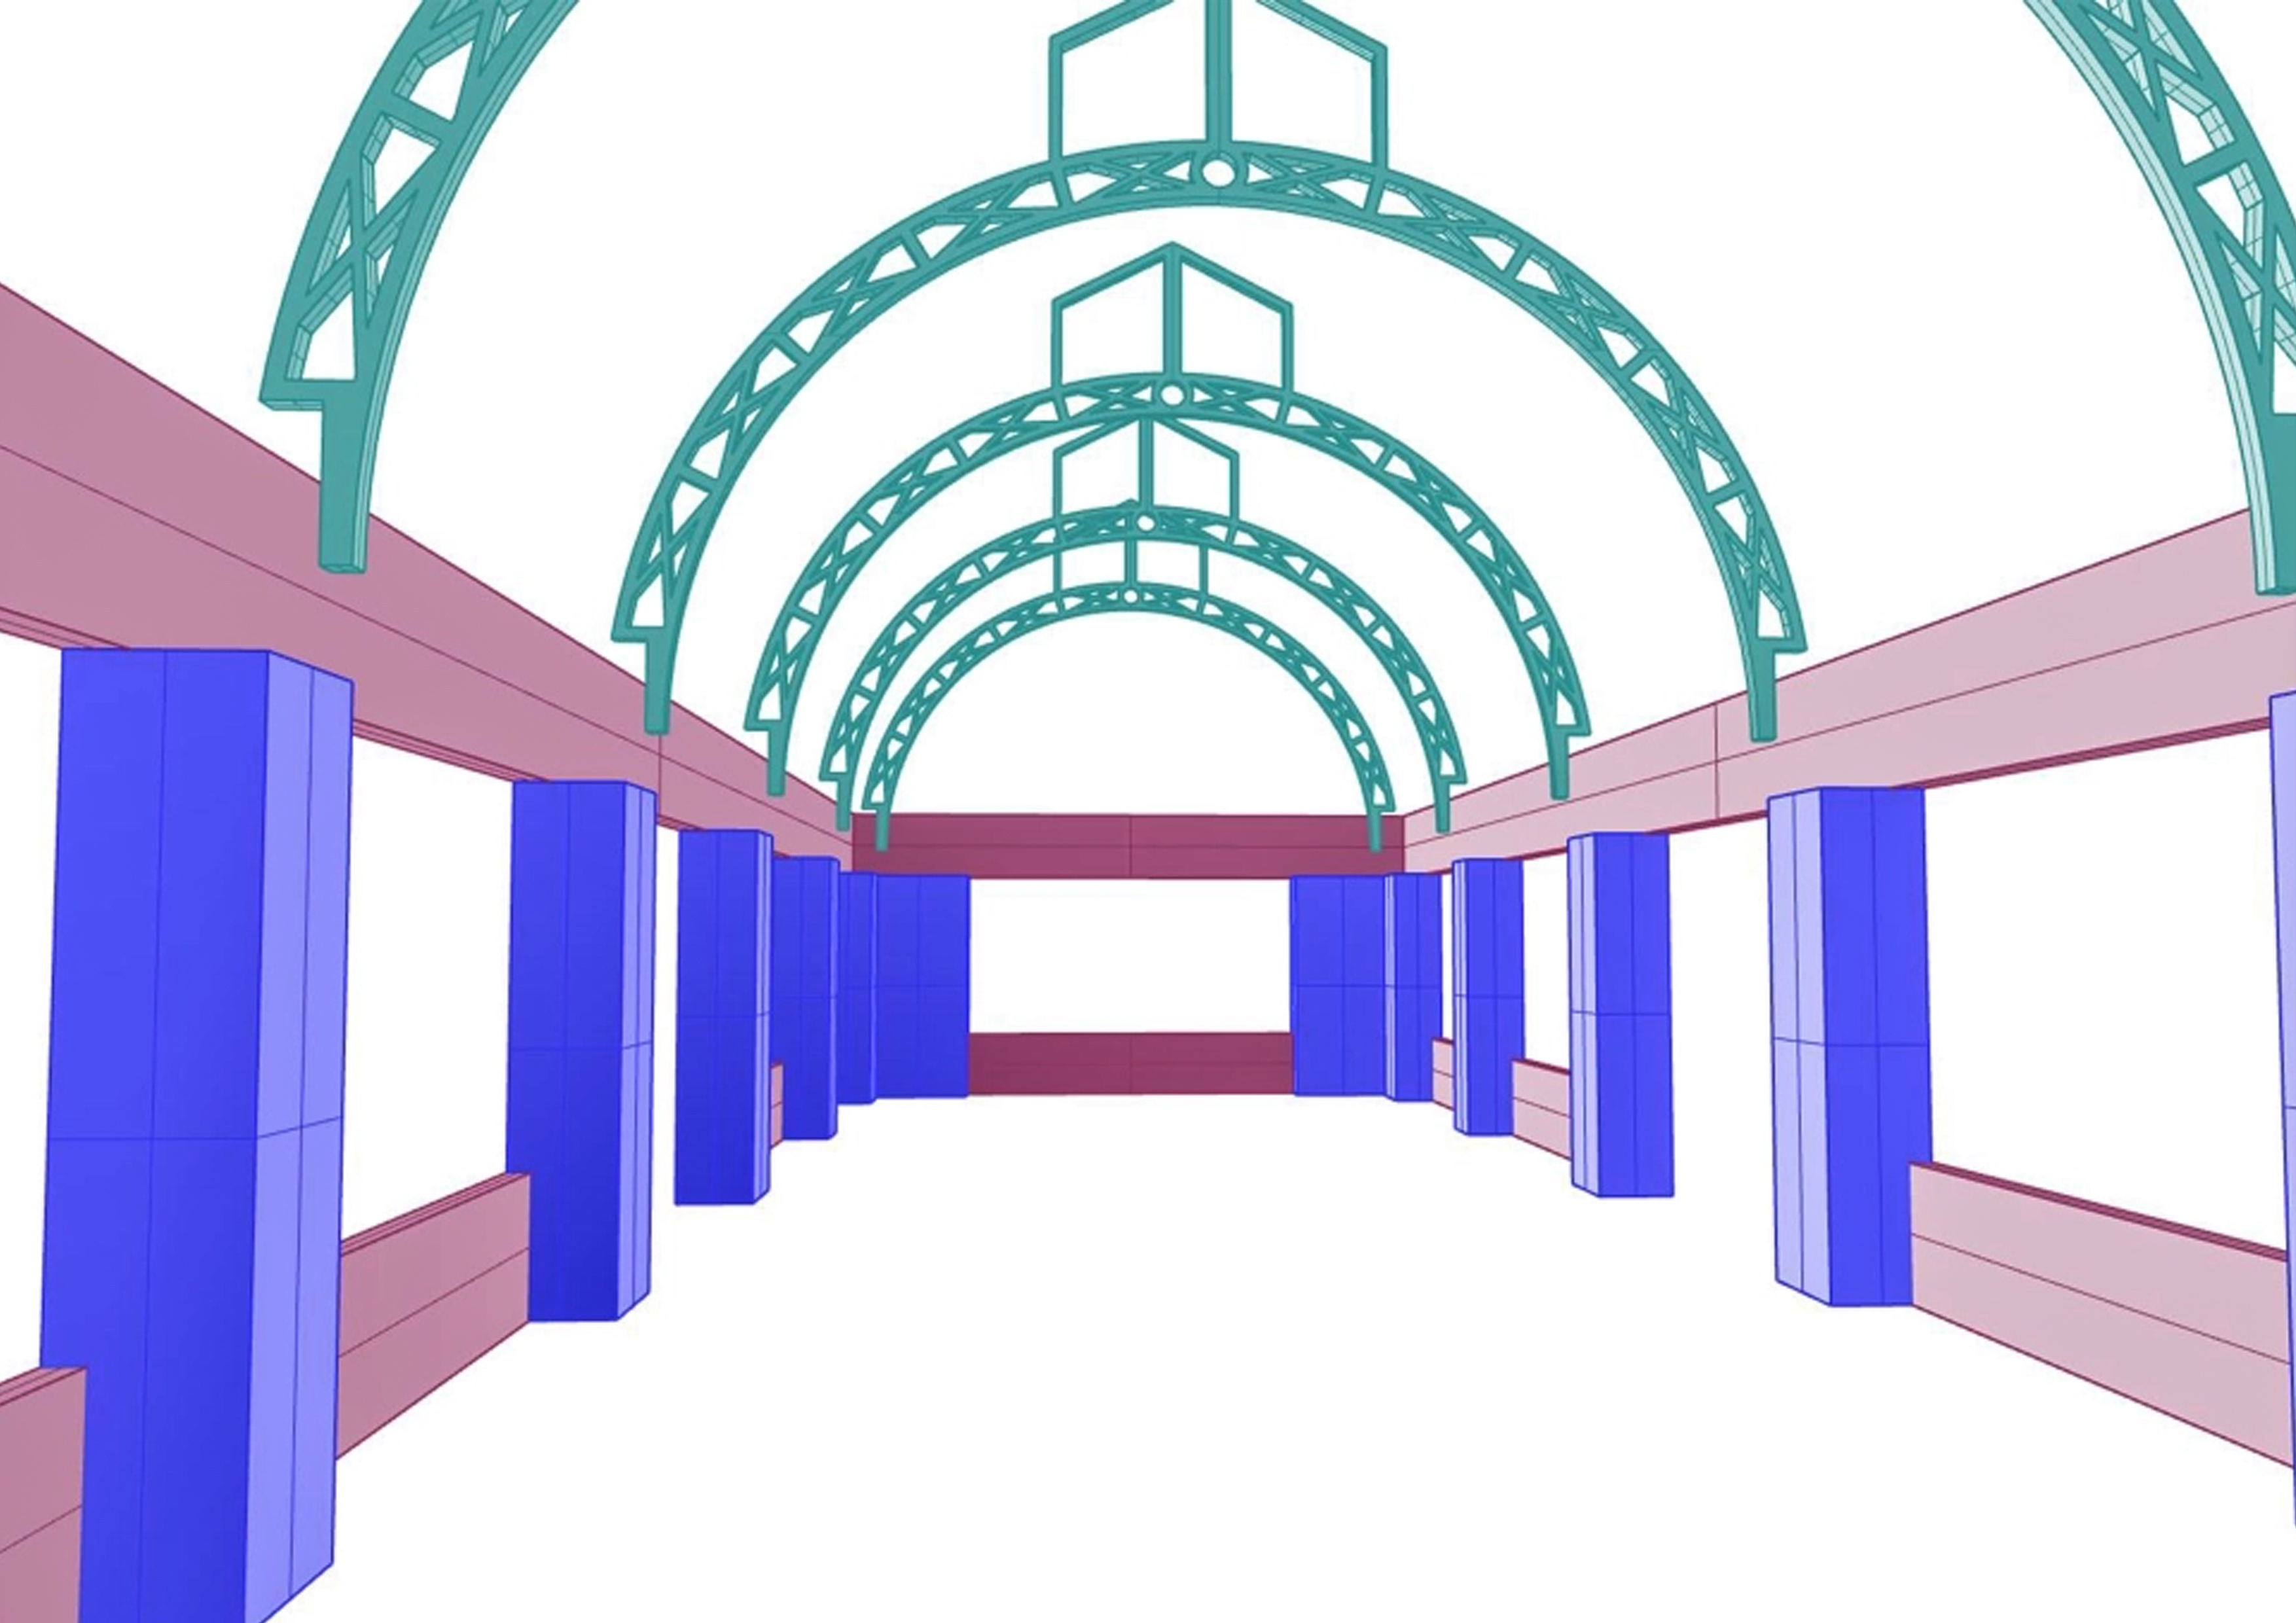
I designed 12 pivoting panels that vary in height, to be displayed in the middle of the open courtyard. Every panel is carved through with a unique pattern inspired by the three main plant houses in the Winter Gardens.
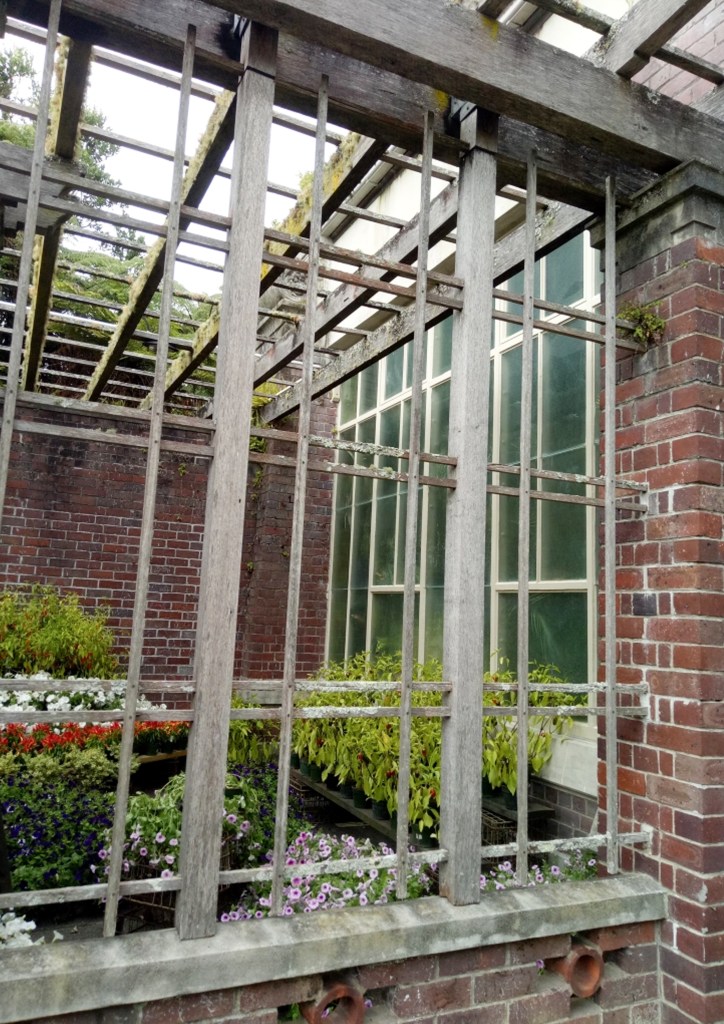
There are three main plant houses on display at the Gardens; Tropical house, Temperate house and the Fernery. While visiting them, I was in awe of the beautiful and unique plants on display. I wanted to allow the different types of plant life to meet one another. To remove their structural restraints and have them share their unique patterns with each other.
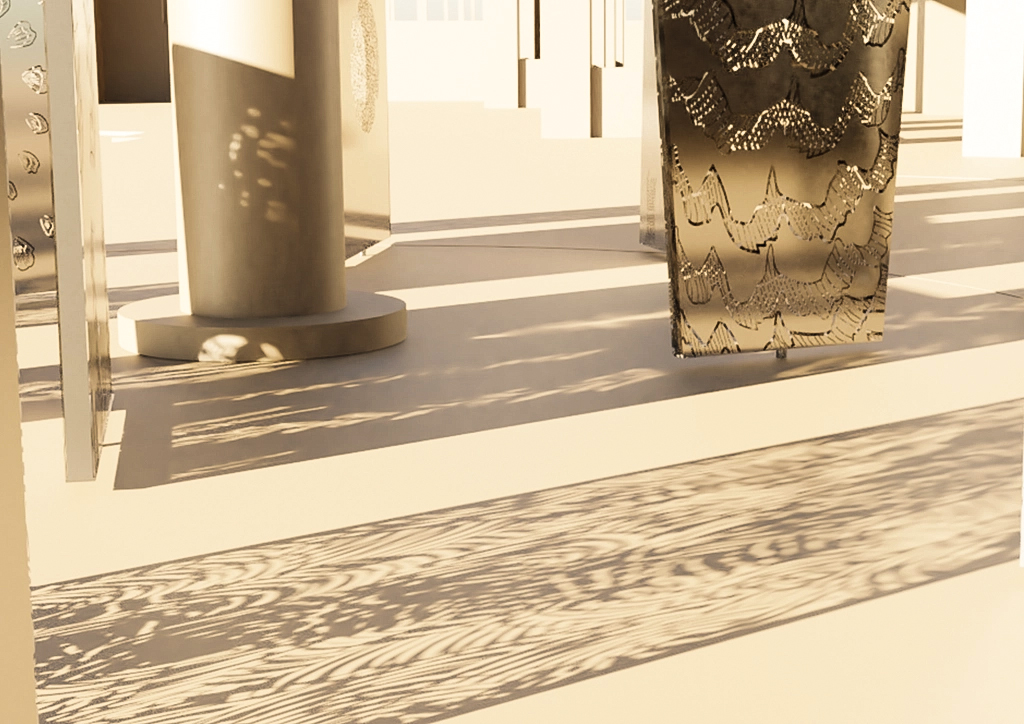
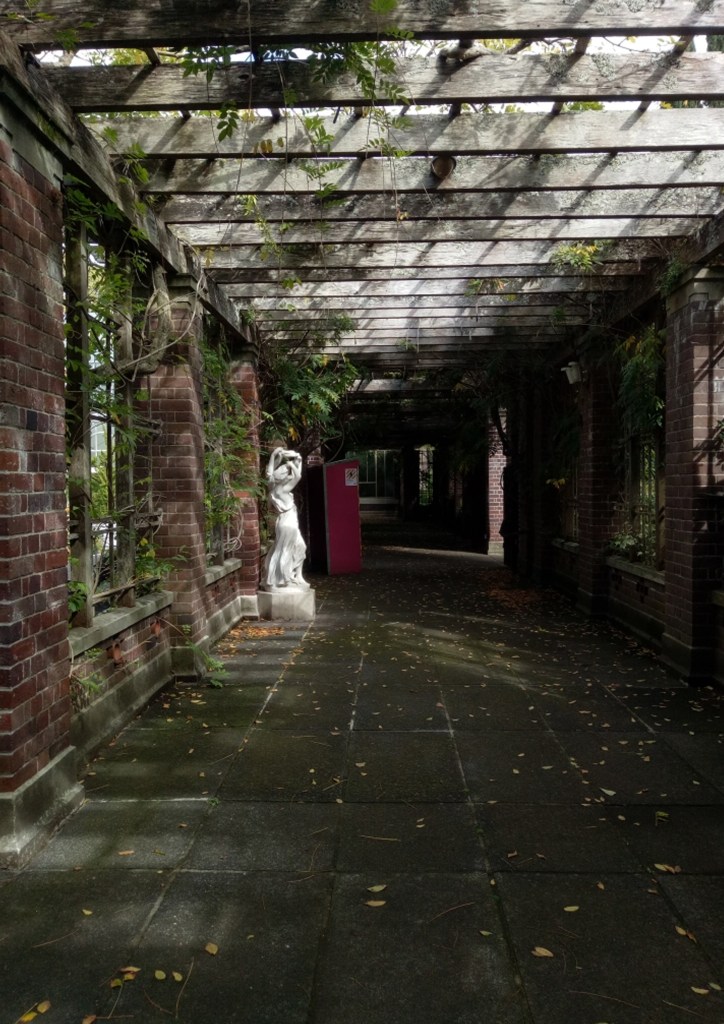
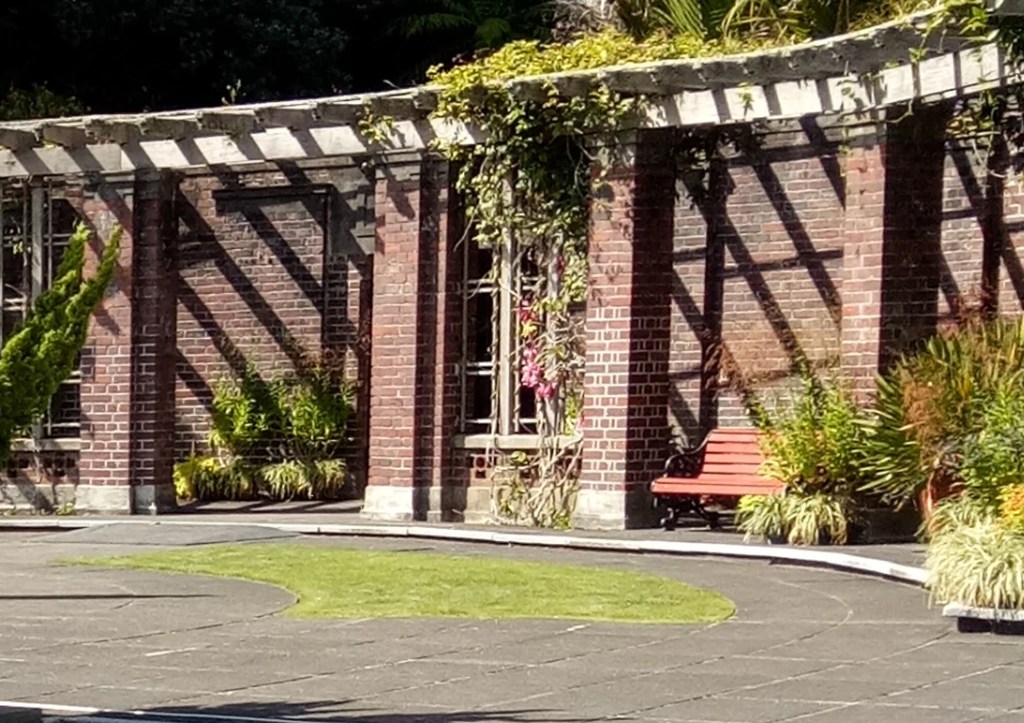
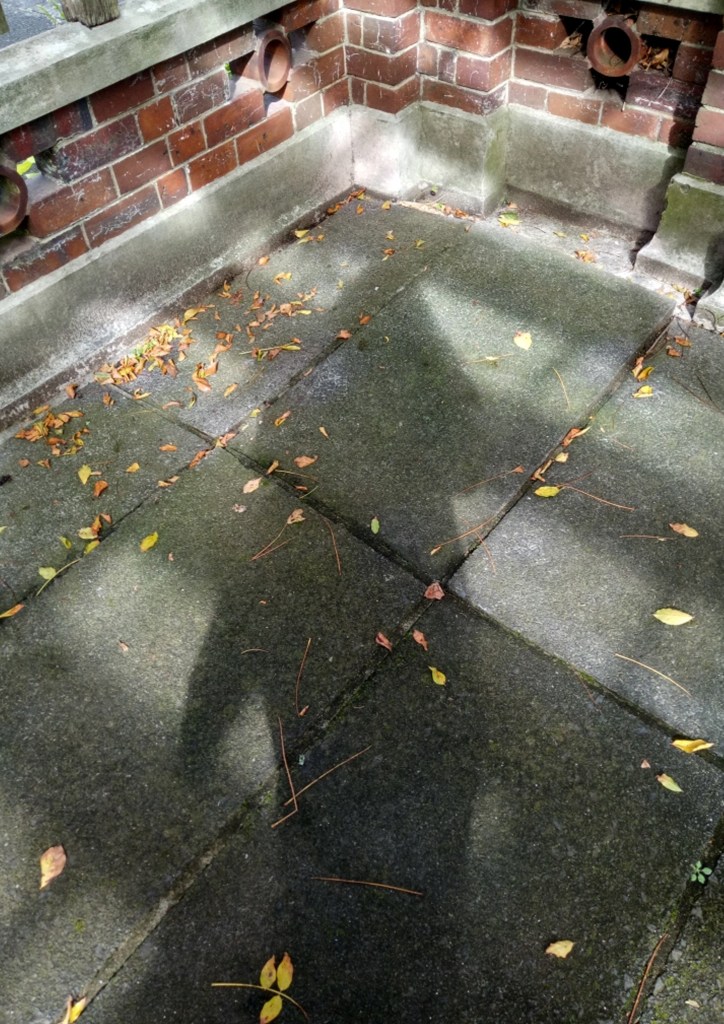
I also began to take notice of the soft shadows being cast into the courtyard from the pergolas found around the garden. Throughout the day the shadows would expand, adapt to any surface and morph into any shape. Inspired with the way in which light and shadow play of one another, I designed metal pivoting panels.
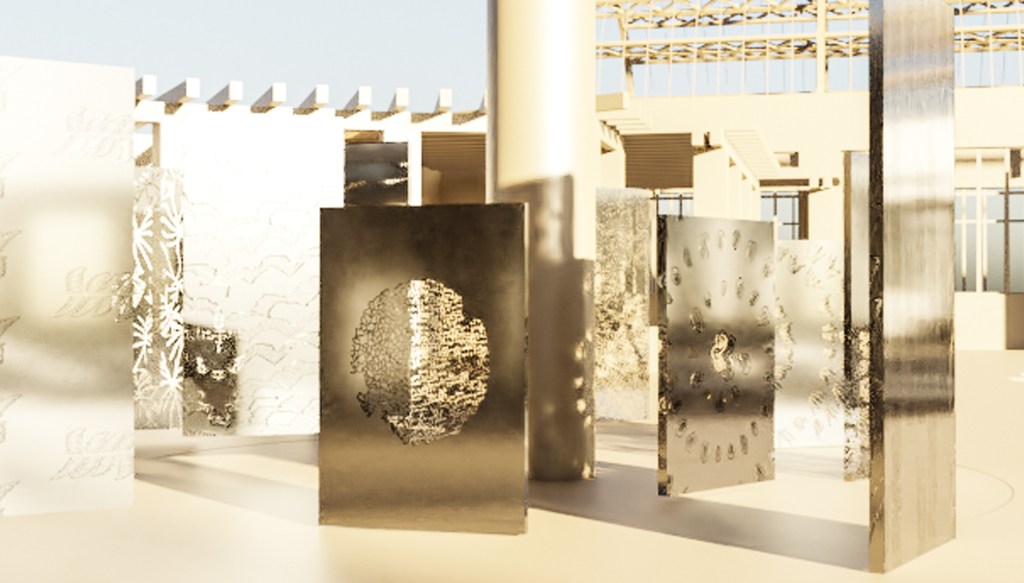
The panels are exposed to the sun throughout the day. The light that travels through the carved panels, projects the plant life inspired patterns on the courtyard. In there, they have freedom to move and interact with neighbouring shadows, making new designs. People visiting the garden during the day will be able to help change the pattern interactions by pivoting them and thereby becoming part of the interaction themselves.
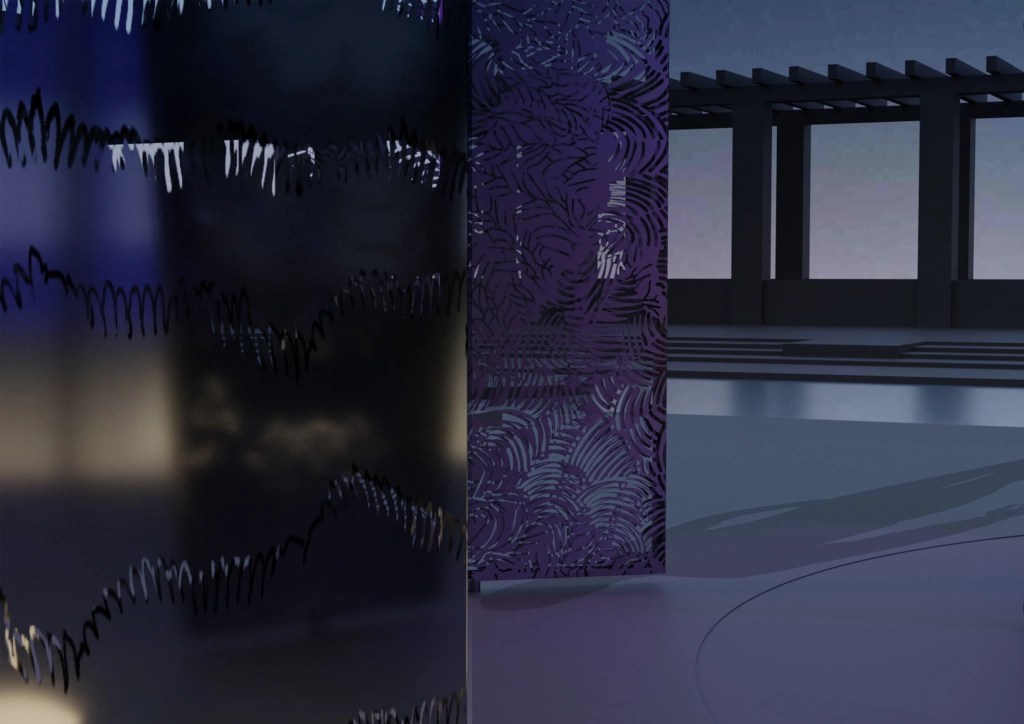
I knew that once the day was over my exhibition could not continue. Therefore, I placed multiple lights positioned around and below the panels to give life to the exhibition at night. Any restriction of movement that the shadows experienced during the day due to their dependency on the sun, would be gone. Allowing the shadows to interact with each other more freely.


All of the final atmospheric images that are shown above were accomplished with the use of Blender software.


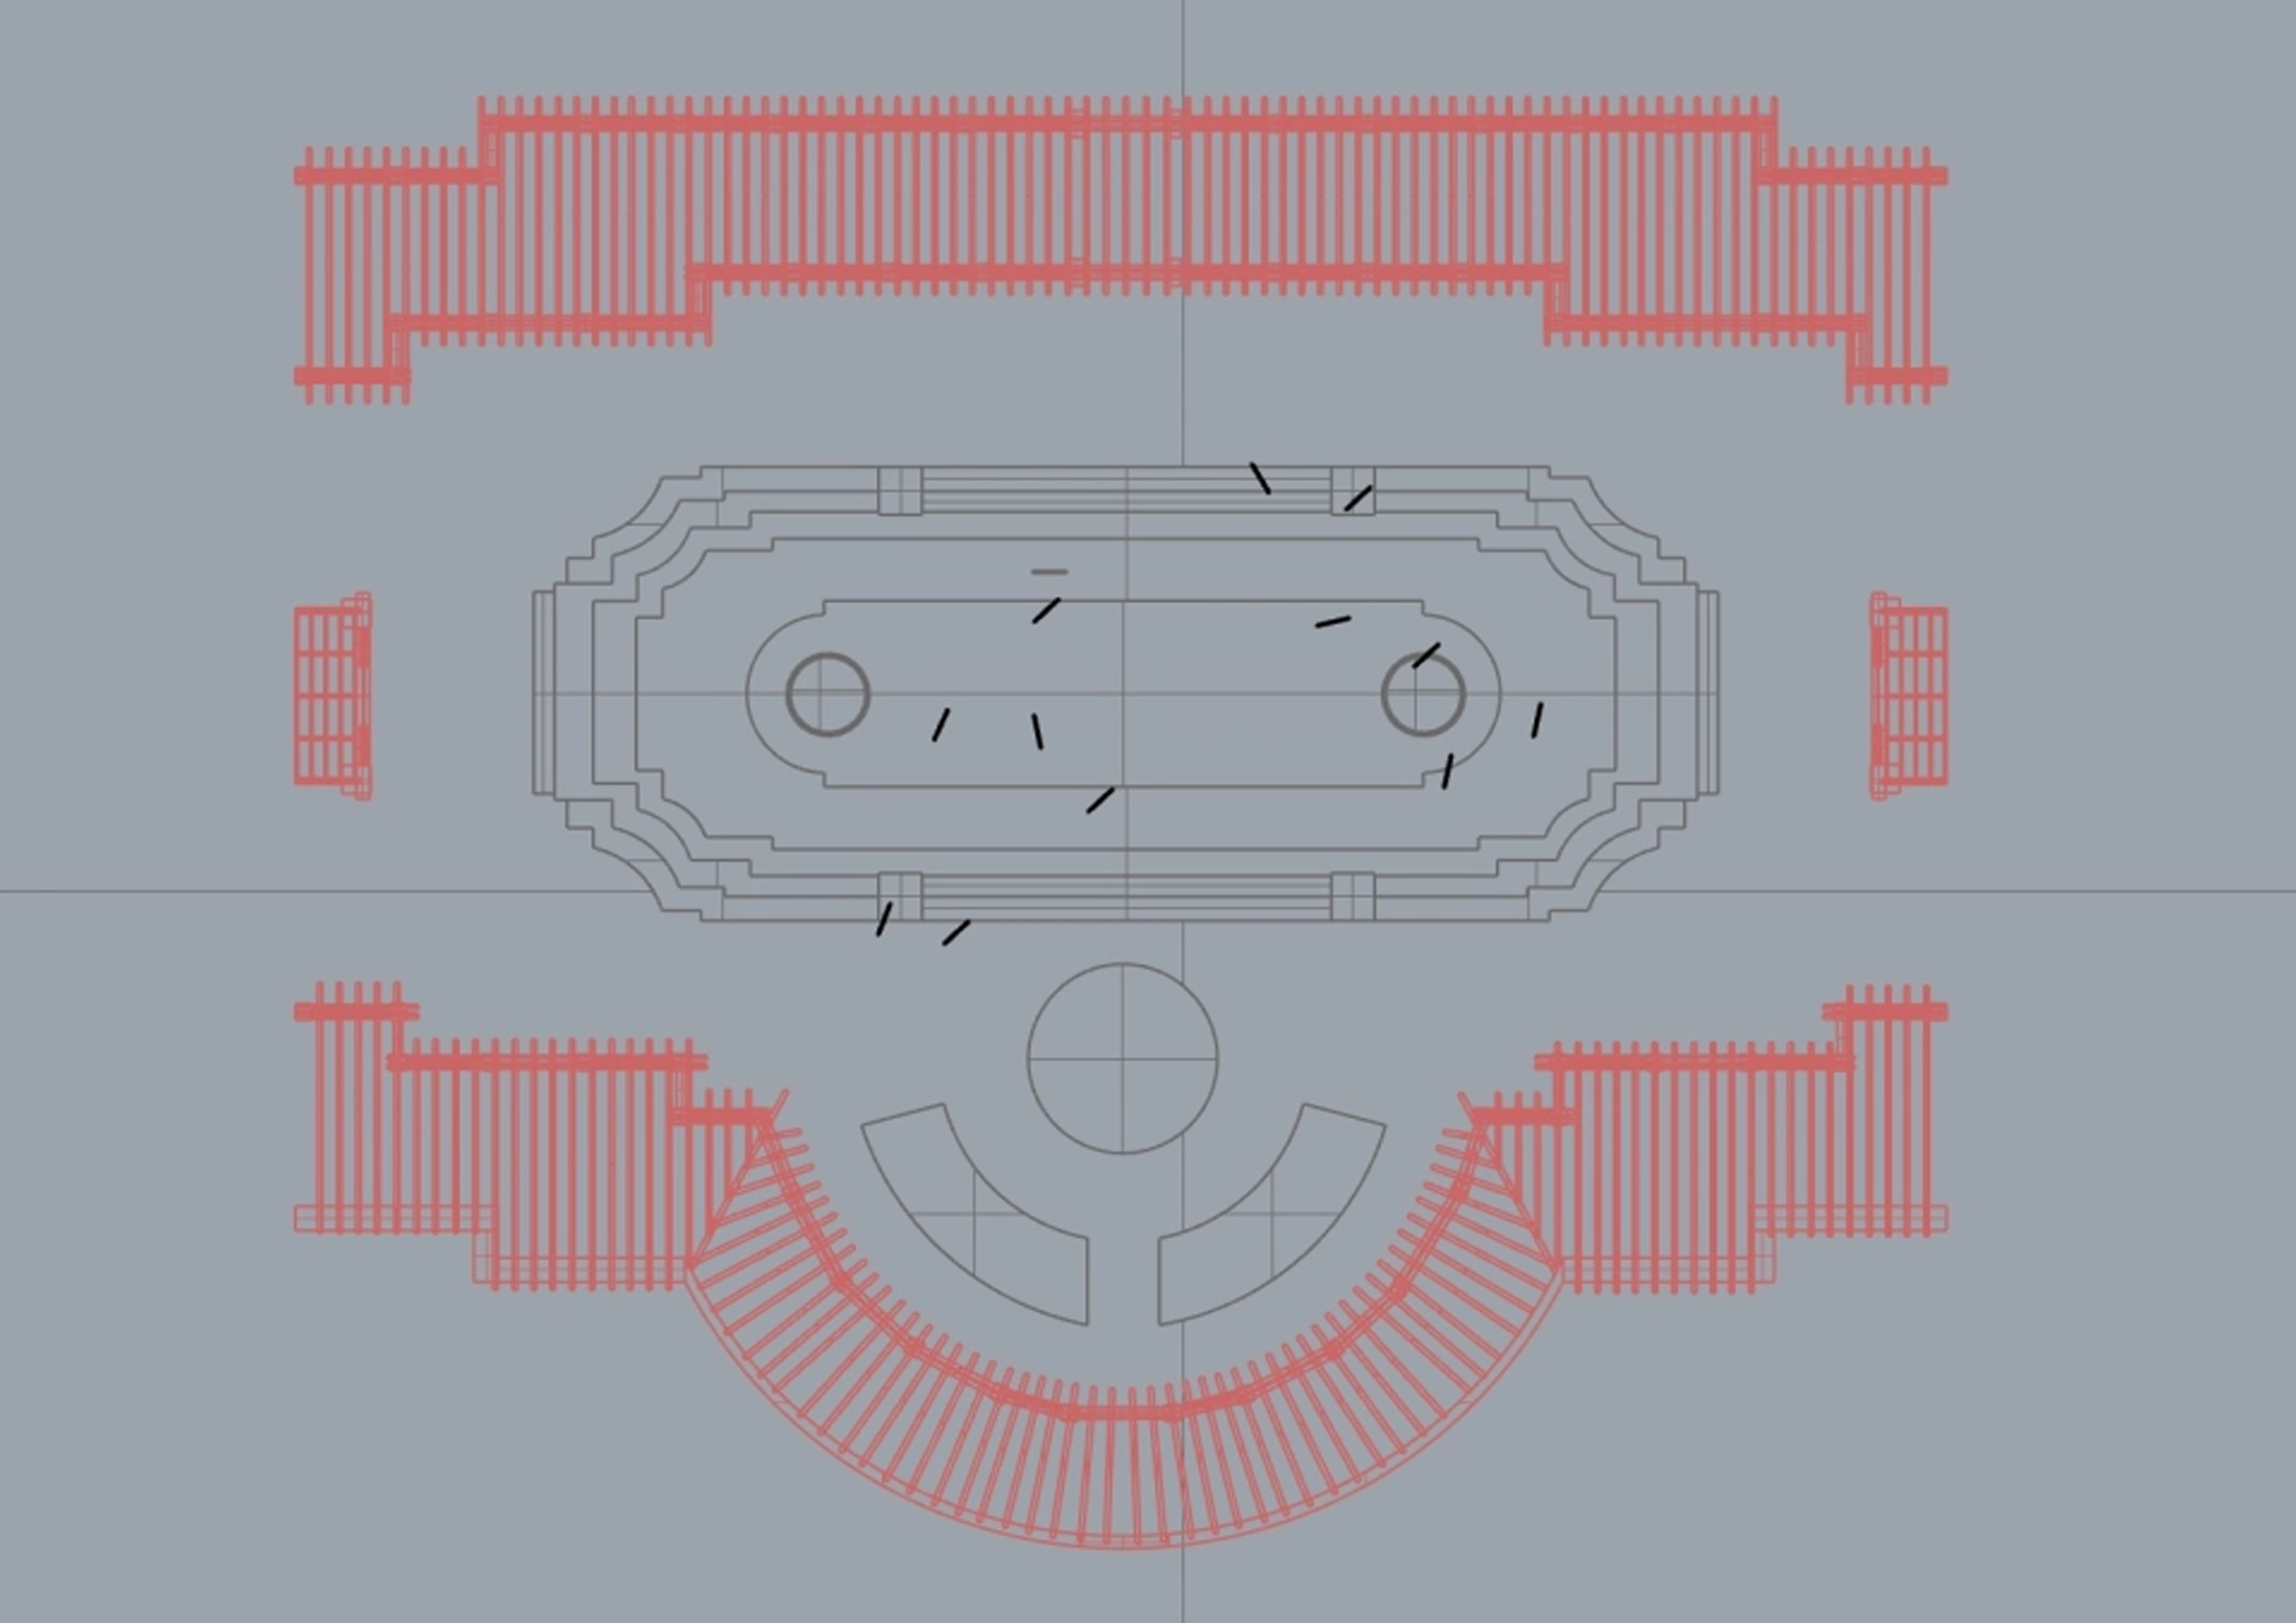
Night Light fixtures

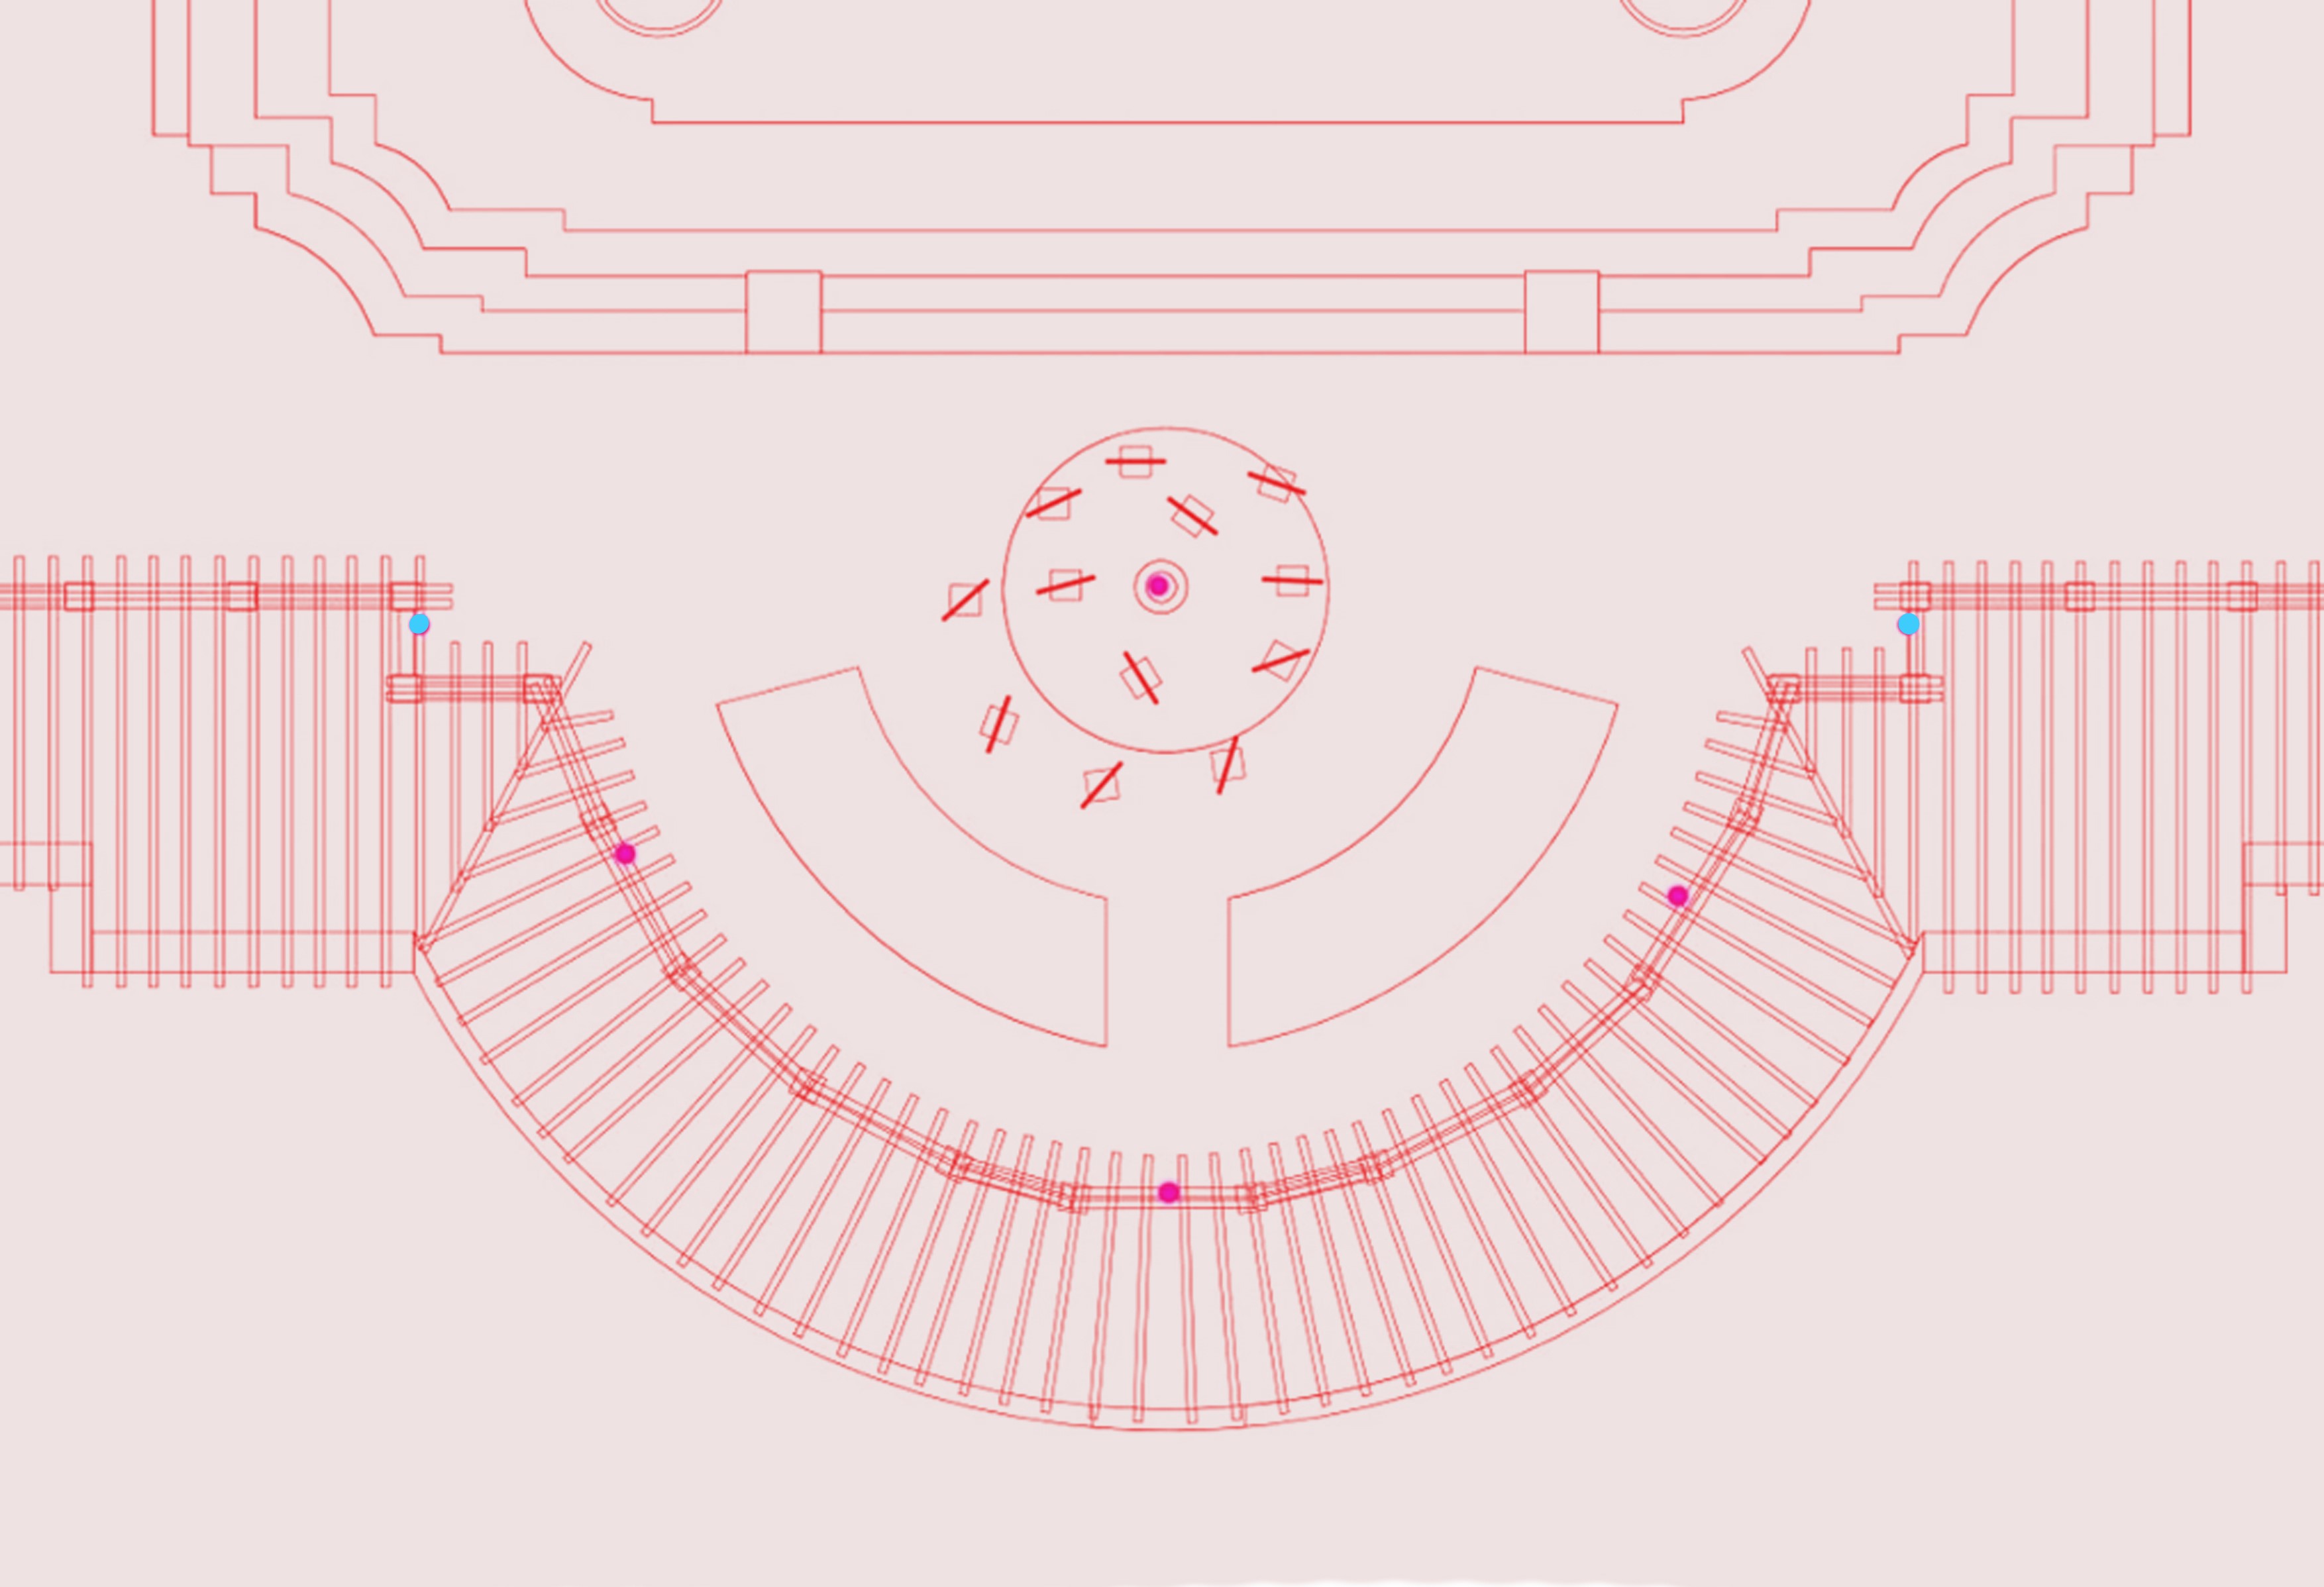
I put in place multiple light fixtures below and around the panels to illuminate them during the night. I wanted the shadows of the carved plant patterns to continue to move freely and interact with one another. I saw an opportunity to add new life to the project by placing a light sequence that reflects the colourful plants on display. The colours served to further unite the plant life.
The dots in the image above show where the light fixtures are located and the different height levels where they have been installed. The pink dots represent the light fixtures that have been placed above the panels with their light shining down on the panels. The blue dots represent the light fixtures that have been placed on ground level looking up towards the panels. I also positioned small spotlights underneath many of the panels themselves, although these not been recorded in the image above.
All of the different lights placed around the panels allow for more shadows to be cast around the courtyard and for the light to bounce off the aluminium panels. The lights have thus removed the restrains created by the singular directional light of the sun.
Process Work
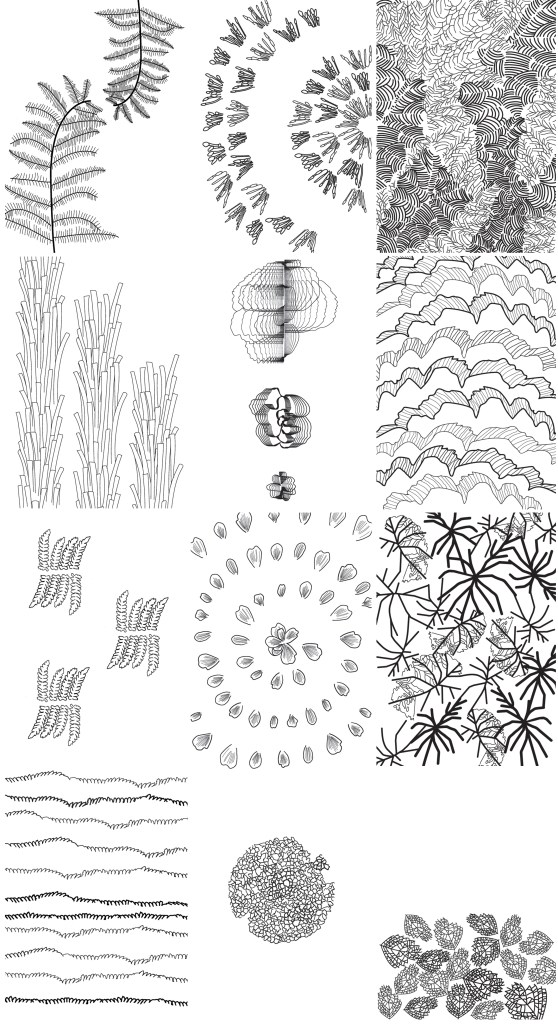
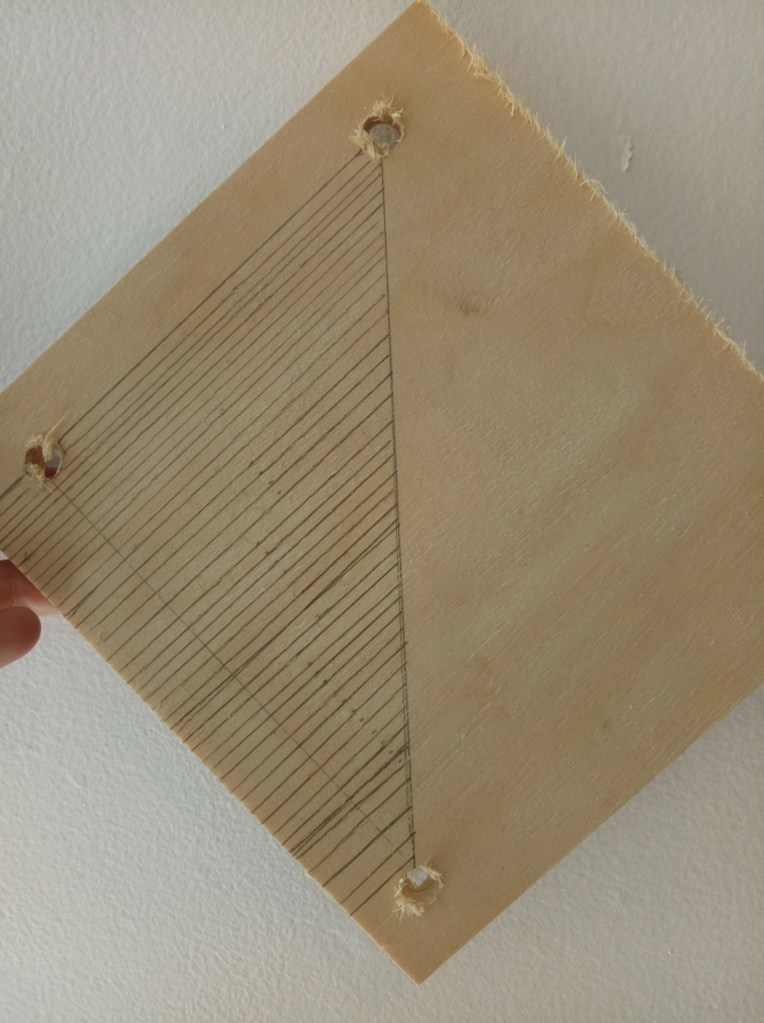
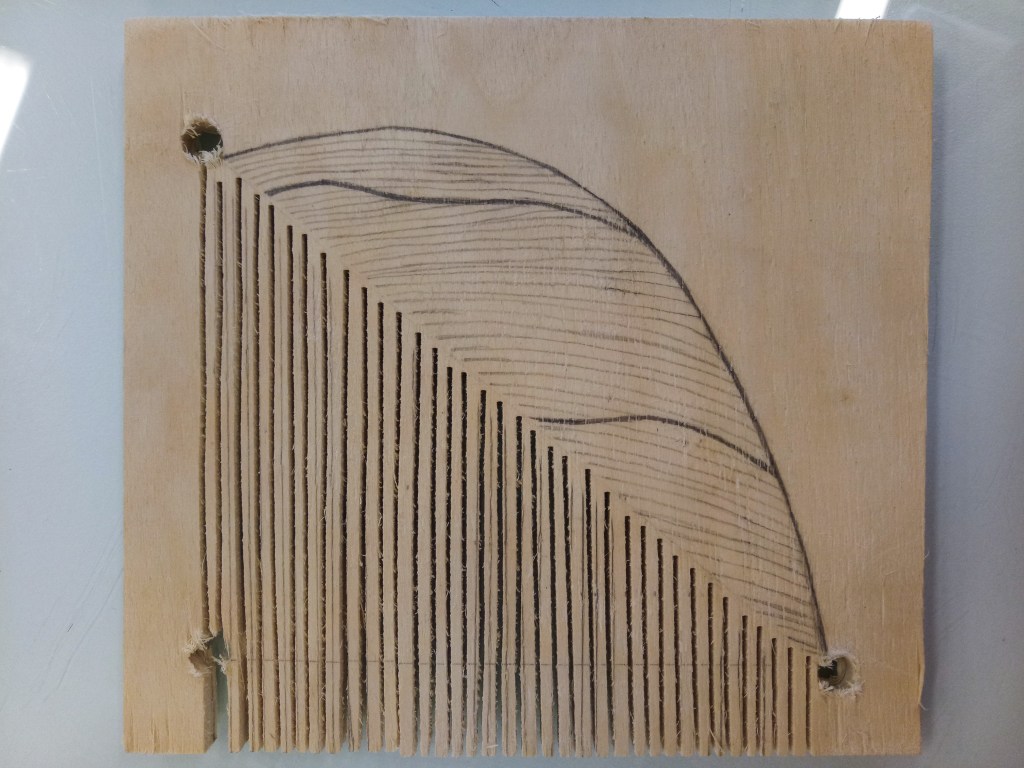
These are the final panel designs. For each of the 3 plant houses at the winter gardens, I designed 4 distinct patterns.
I studied the overall feel of each plant house to understand what set them apart from each other. I wanted to be able to capture the essence of all 3 houses, to then best express them on the panels.
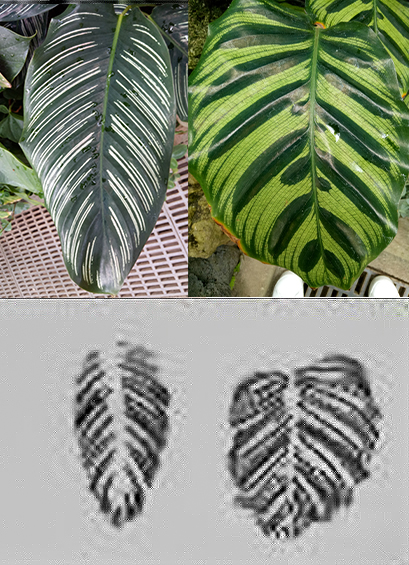
I found the Tropical house to be an overwhelming space. The plants were pushing against the glass house, barely being contained. All the patterns I created to represent the Tropical house are busy and bold.
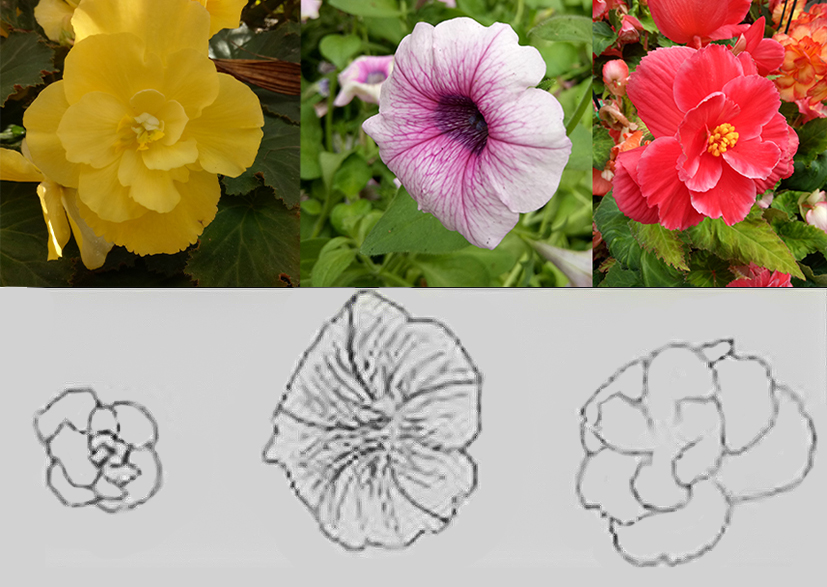
The Temporal house is filled with delicate flowers where the focal point of the plants lay in the centre point. From the centre the flowers unravel outwardly. The patterns I made emphasise the central nature of the plants, delicately spaced and radiating from a central point.
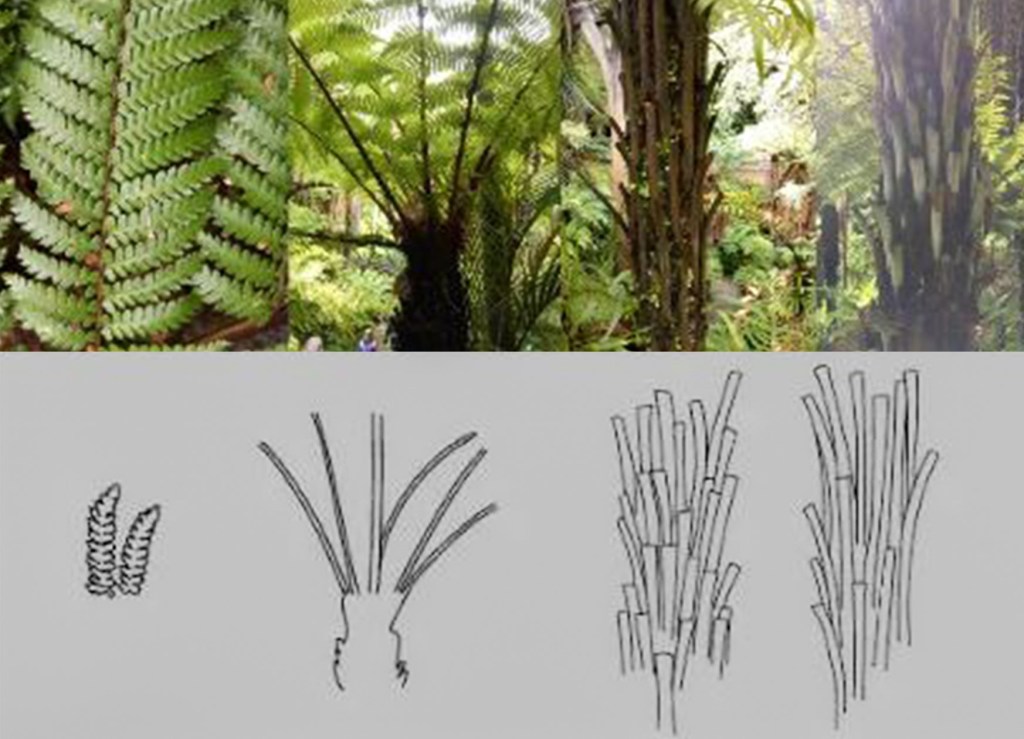
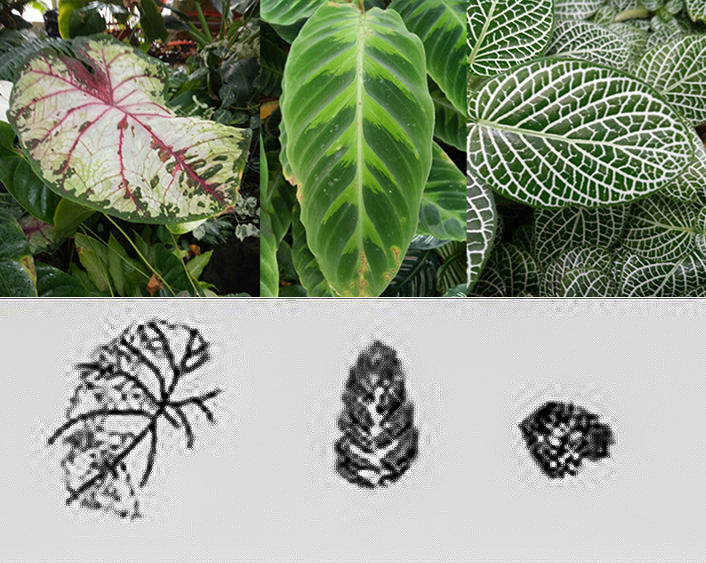
While observing the Fernery, I found the most distinct features of the plant life to be their staggering height and repetitive leaf patterns. When creating the final patterns for the Fernery, I focused on building length and forming new figurations with repetitive leaf detail.
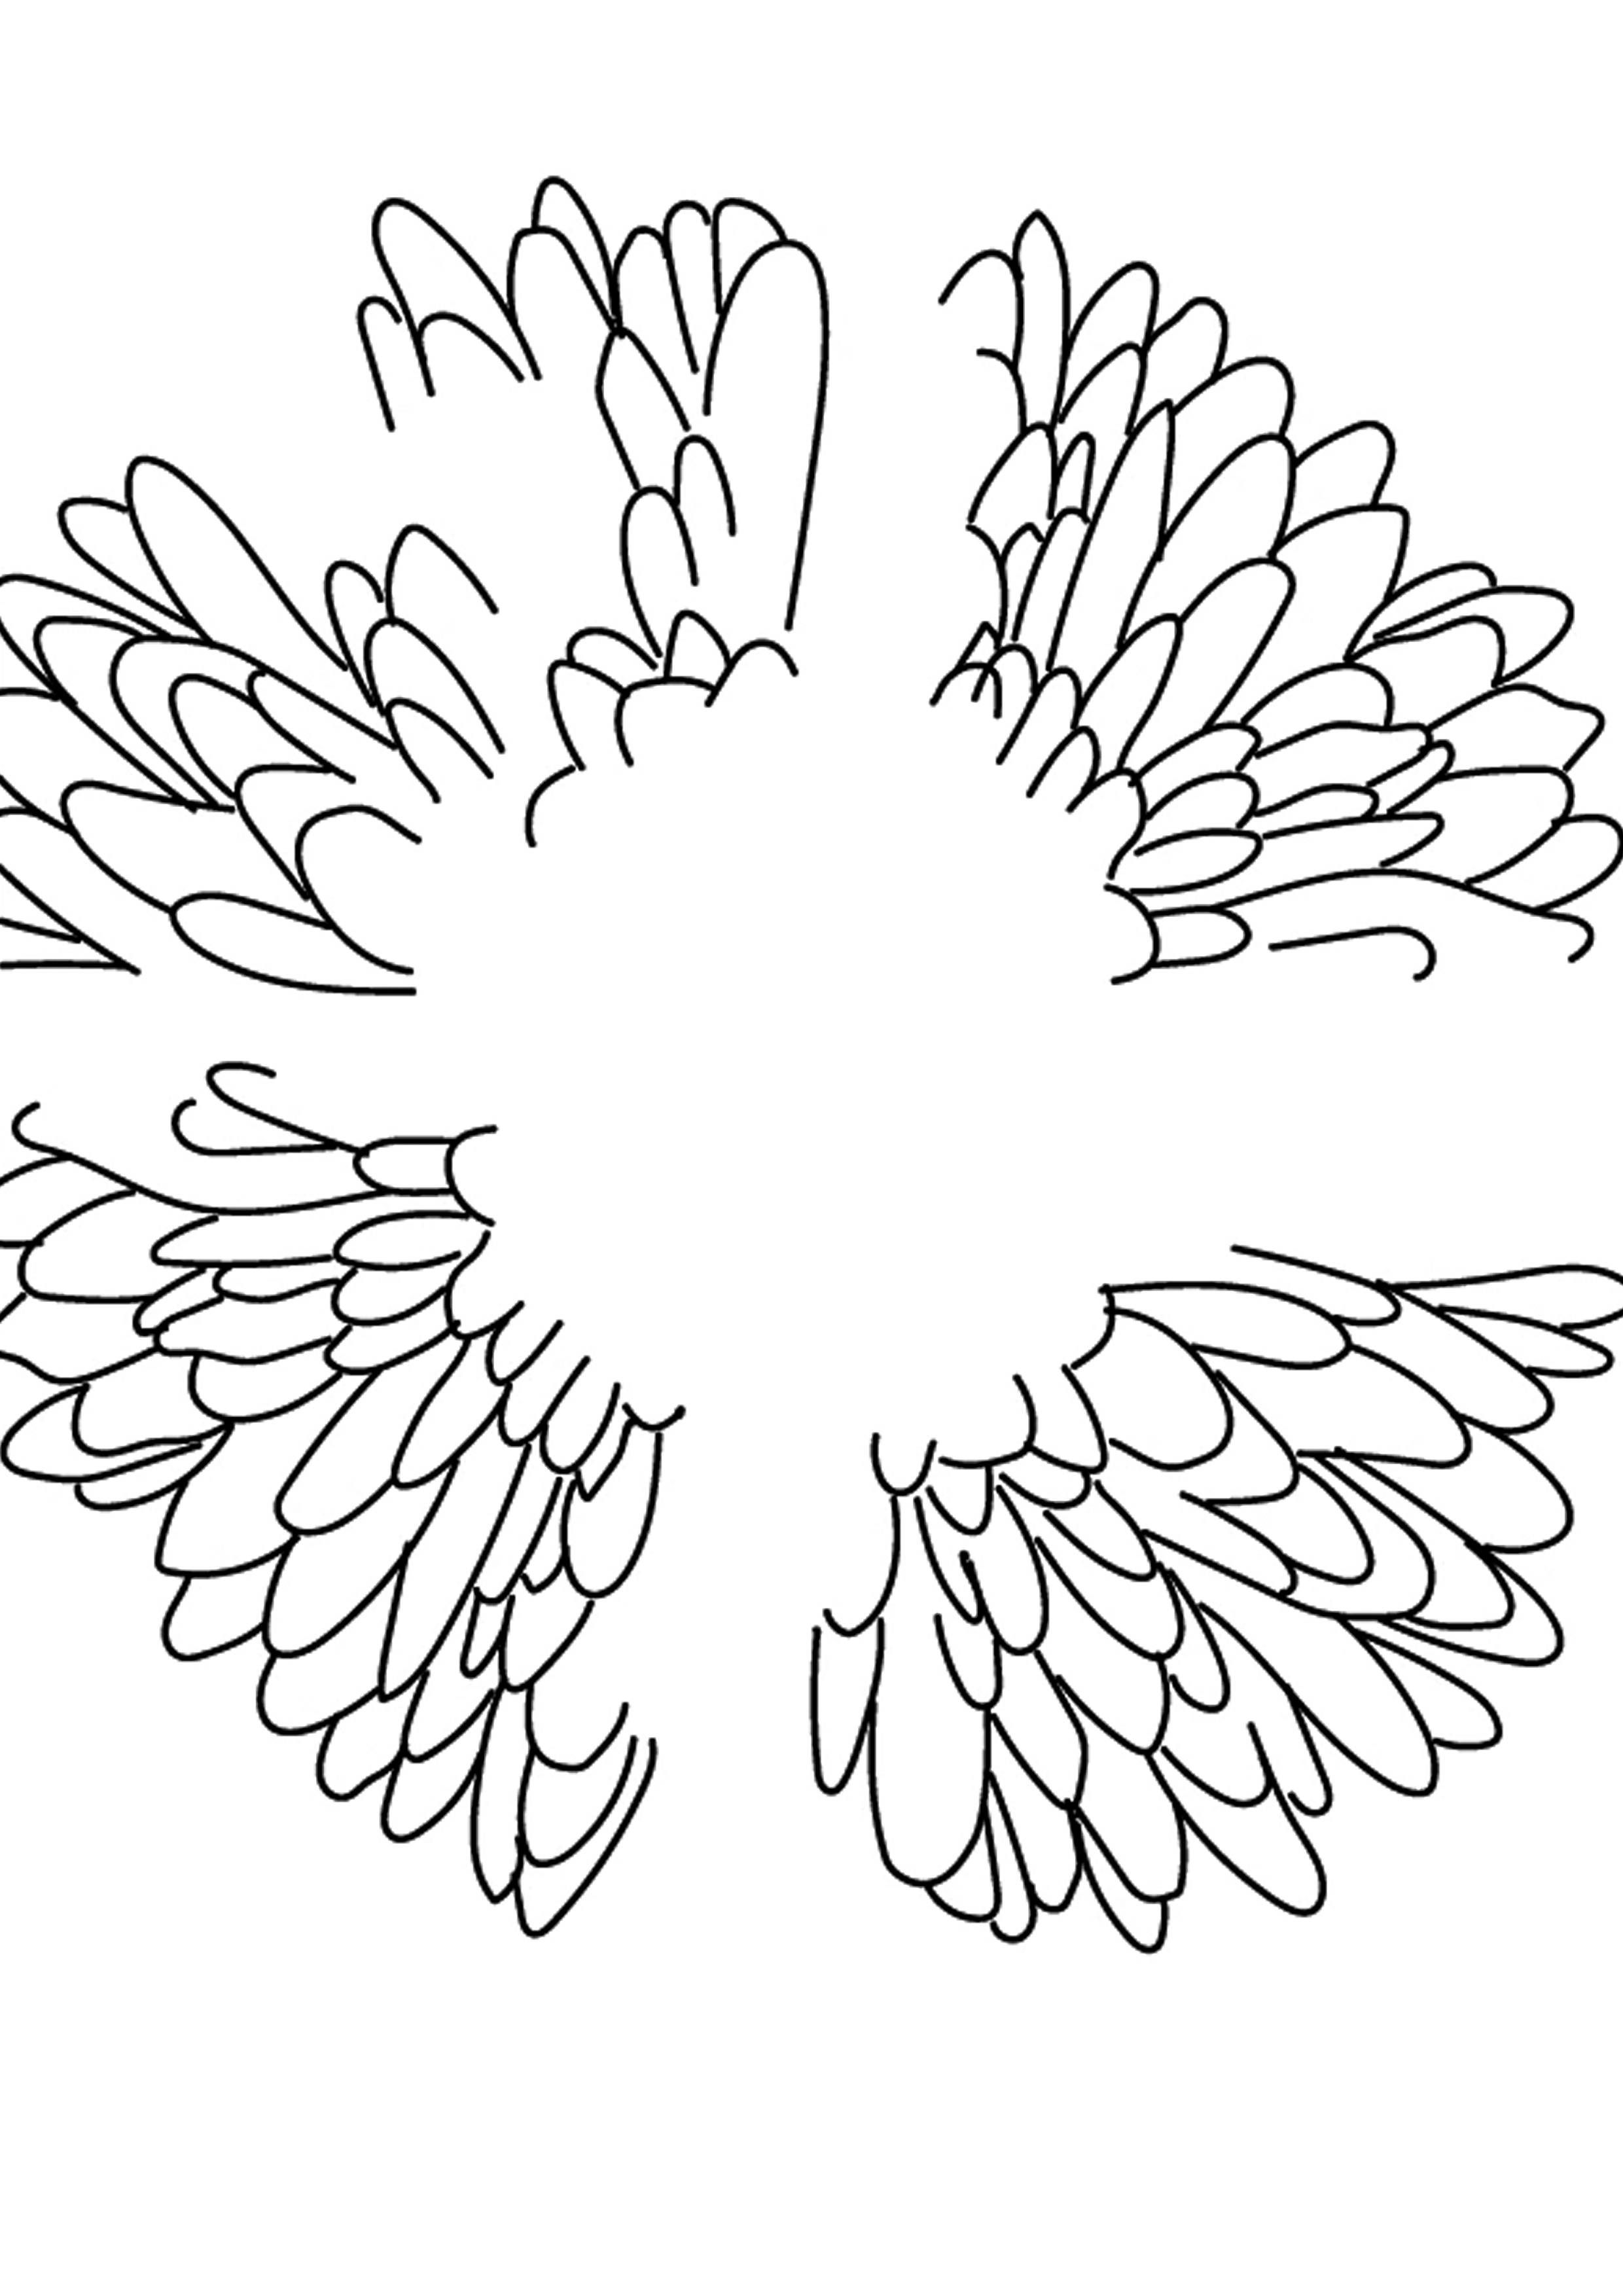


Above are some of the pattern designs I rejected. To me they were either too confusing, lacking harmony or too simplistic.


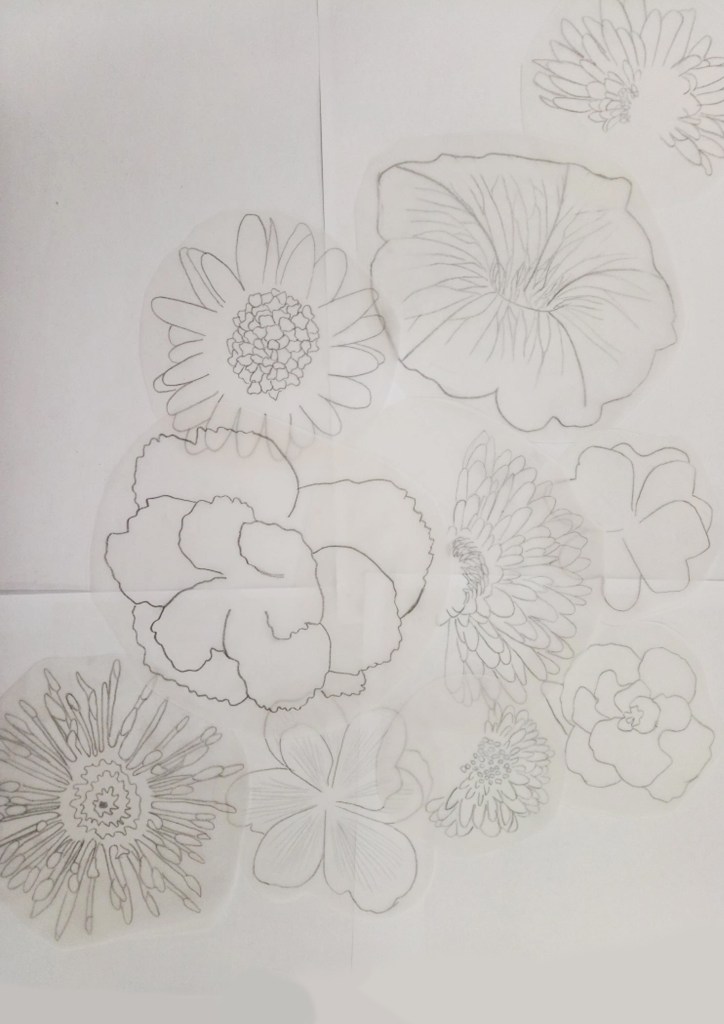
Captivated by the unique plant life found at the Winter Gardens, I photographed many of the plants. After sifting through all the images selected the ones I found most striking.
Using butter paper, I traced over the selected images to isolate their details and shapes into readable line work. I later transferred this line work into Illustrator where I could gain more control of the designs I created. This allowed me to re arrange the line work and built new patterns.
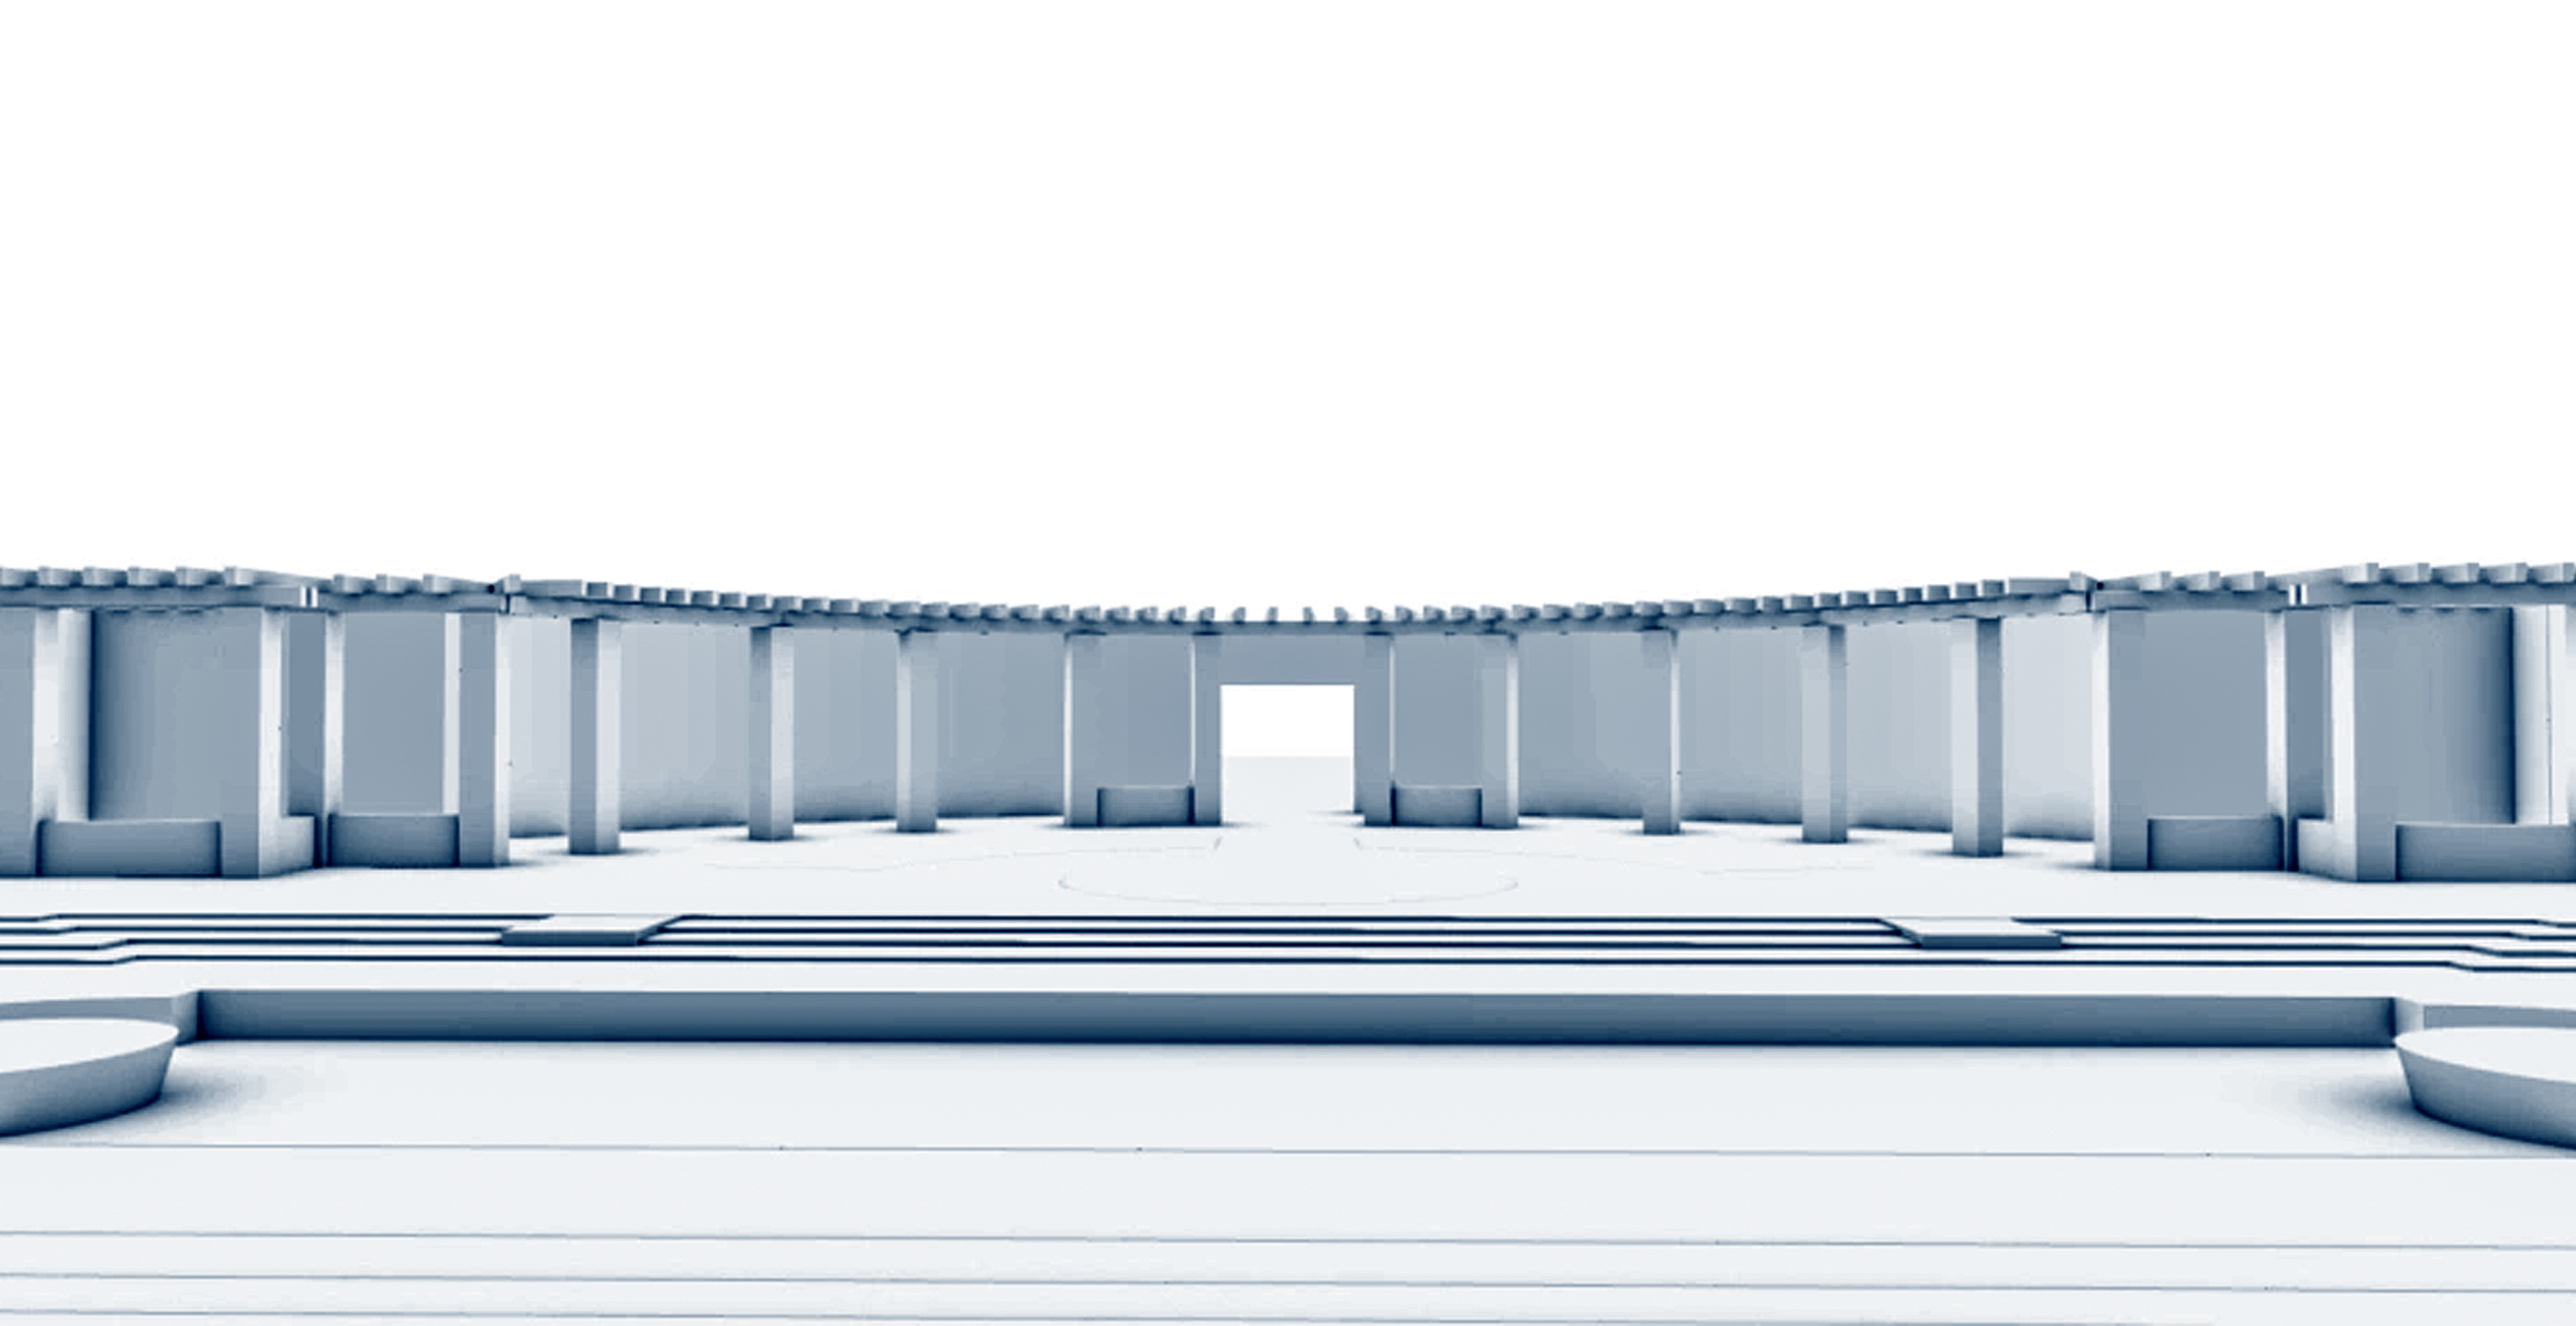
Finding the right panel location
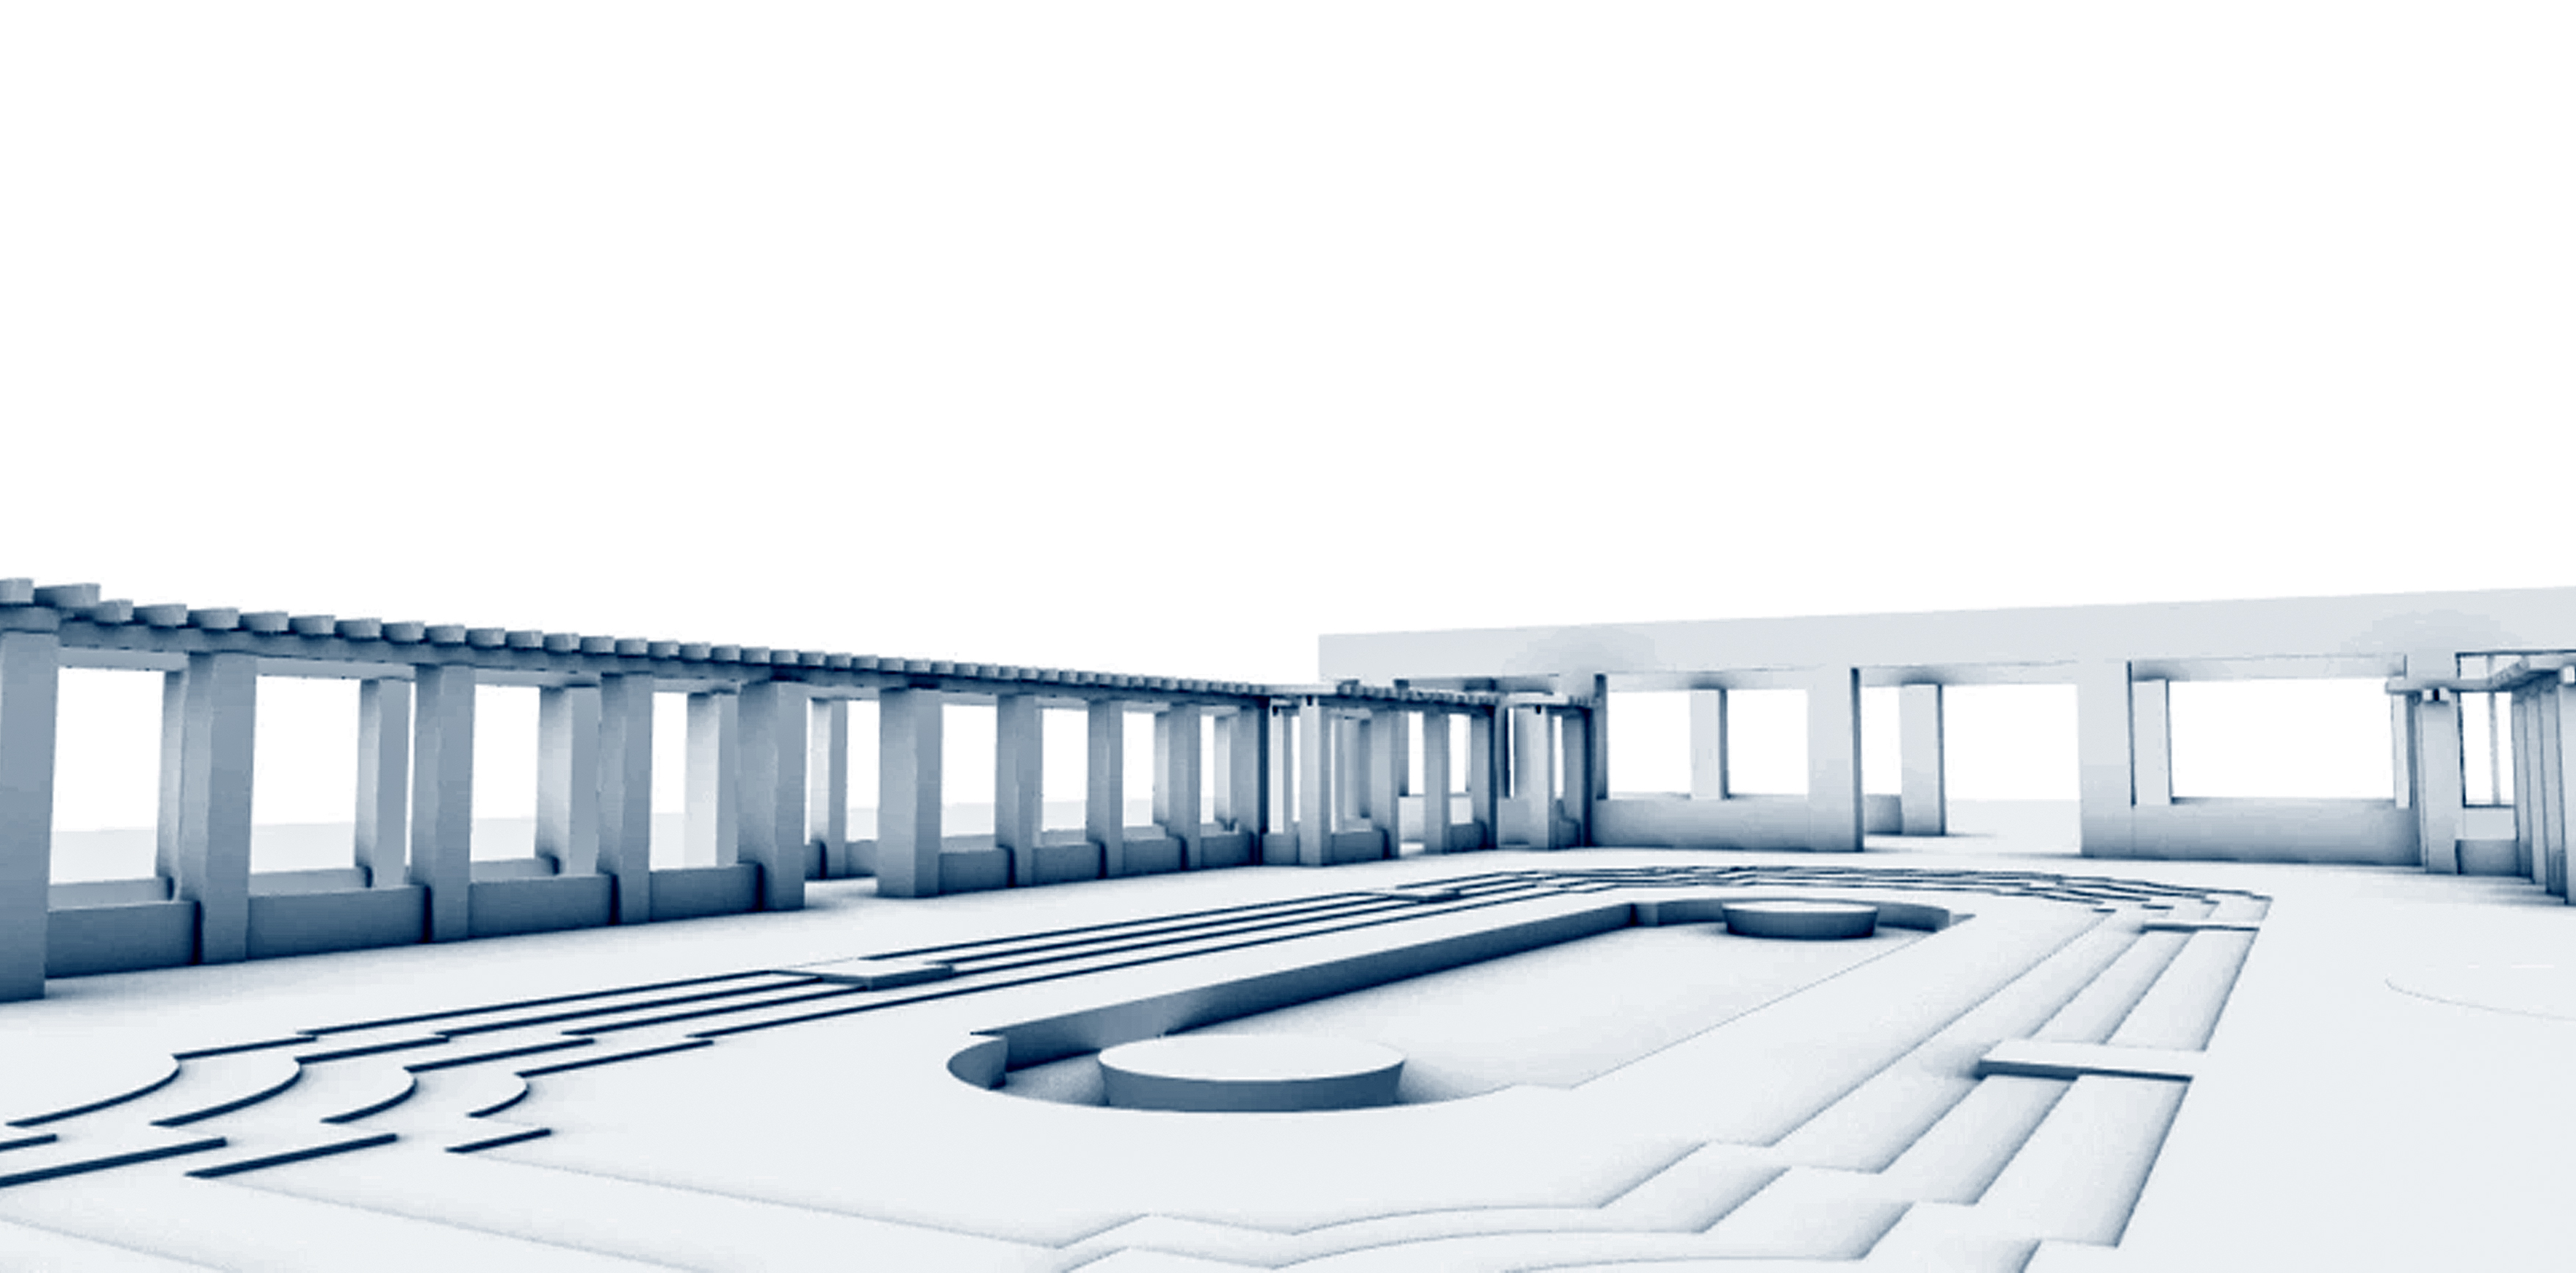
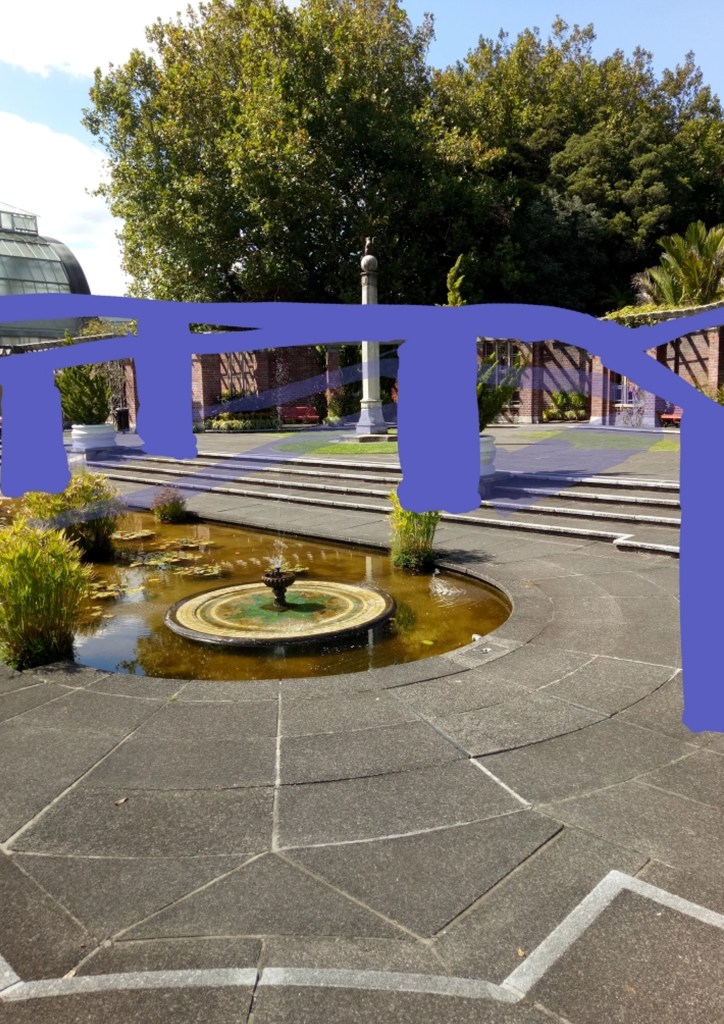
To find the right location for the panels required some testing. Although I knew I needed them to be close together so their shadows could cast on one another, I needed to explore the best spot to place them in the courtyard. A place where they would have light exposure during the day and visitors could interact with them.
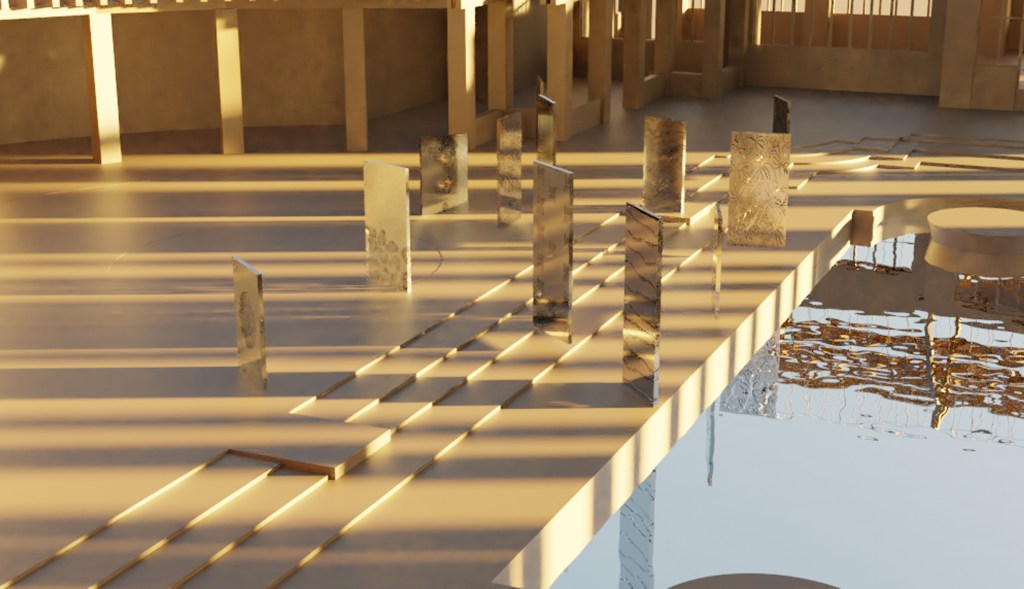
Through testing I ultimately decided to place the panels in the middle circular area of the courtyard by the pergolas near the Fernery. I found it the ideal spot as it received light all day round, it is a levelled surface that visitors can easily go between and serves as a symbolic space as it is in the centre of all 3 plant houses.
The images below show some of the locations I thought about placing the panels. Although having the panels go across the pond and throughout the stairs could look beautiful, I thought they were too spread out from each other and this would interfere with the harmony of the pond.

Panel construction
Constructing a pivoting panel that could stand without need to rely on an assisting roof or some kind of railing system required sketching through many ideas and conversations with my professors.
My initial design inspiration was wind breakers, they were the first panel-like structure that expressed what I wanted to build. They are light enough to be moved by someone, have minimal structures supporting it upright and they hover close to the ground. All of which I wished to apply to my pivoting panels.
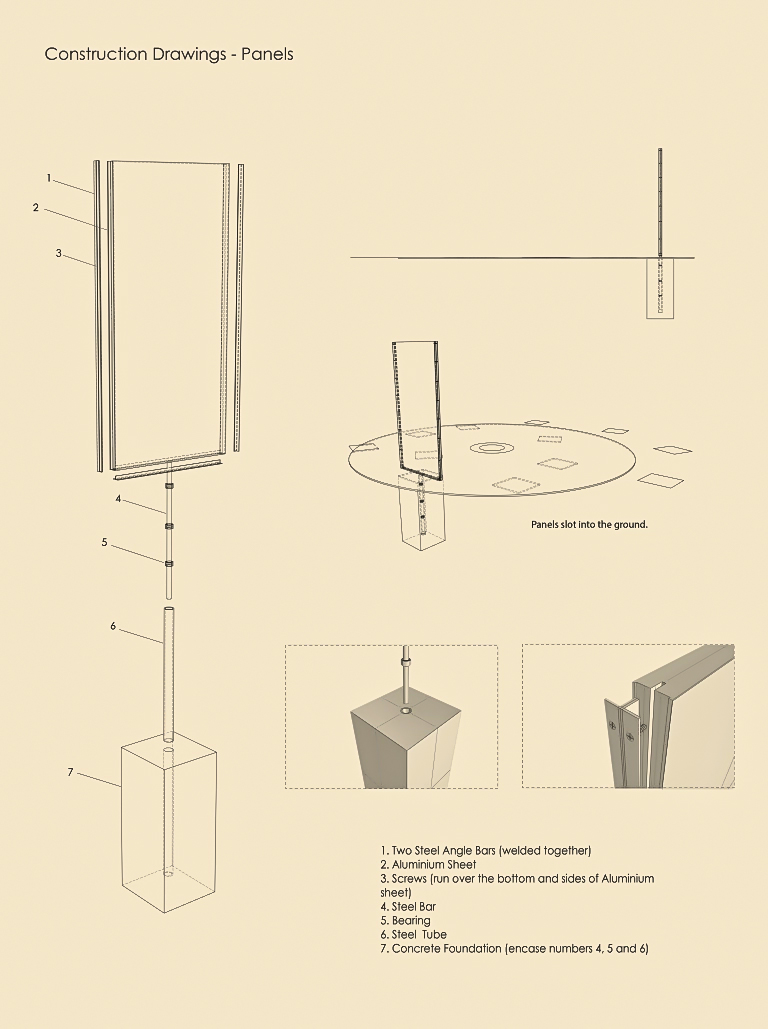
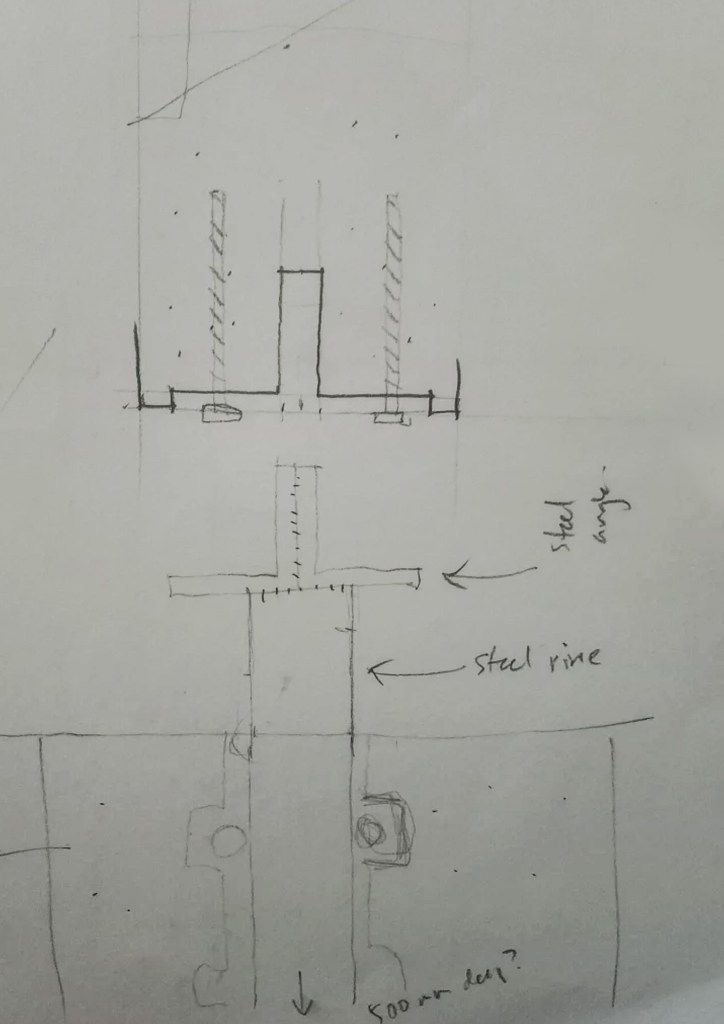
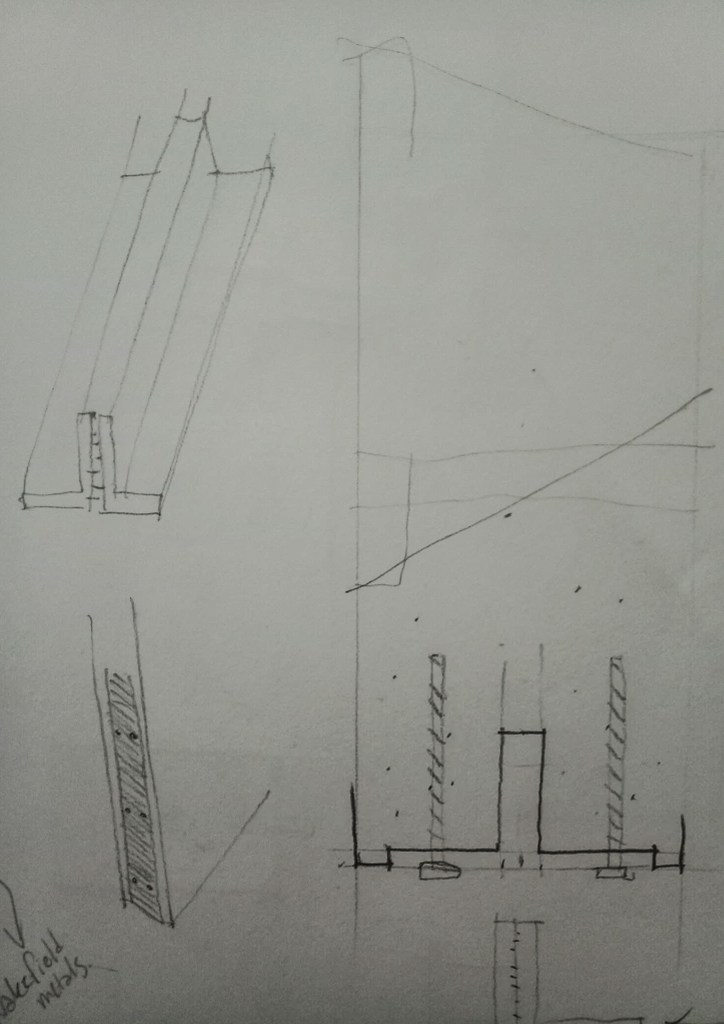
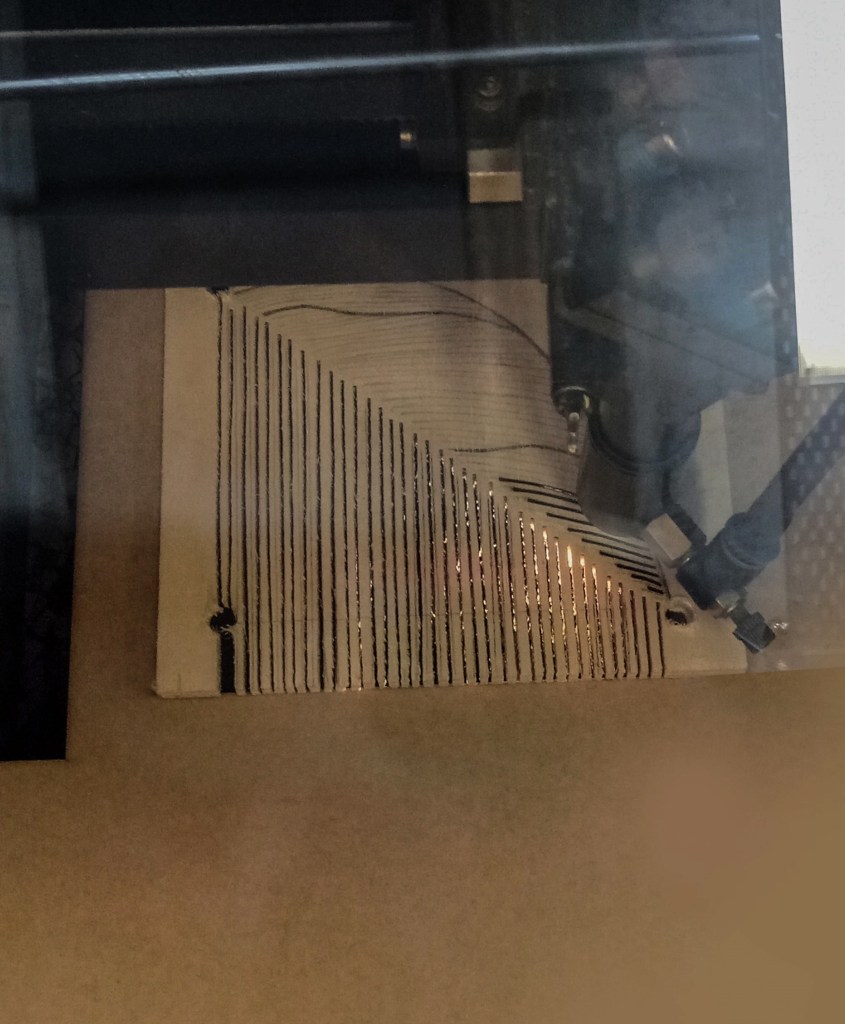
When thinking about a way to secure the panels in place I knew it needed a strong frame that could support the panels all around and be held in place by drilling into the panels and fastening with screws. To carve out the pattern designs on the panels I planned on using laser cutting since it makes accurate and readable cuts. This process I would repeat on the rest of the panels.
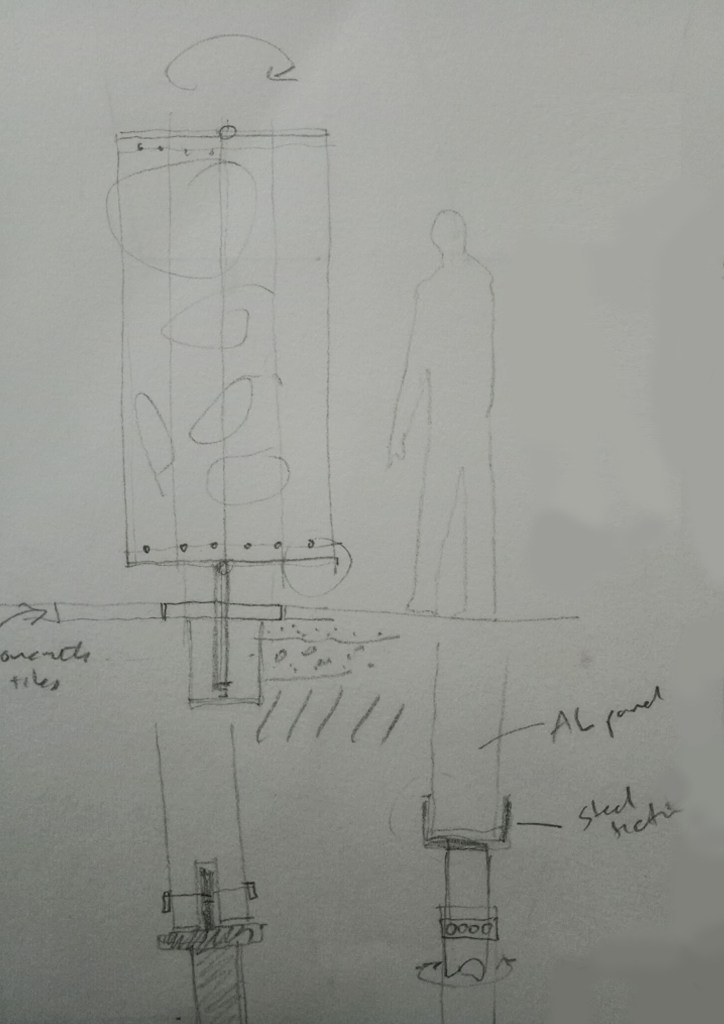
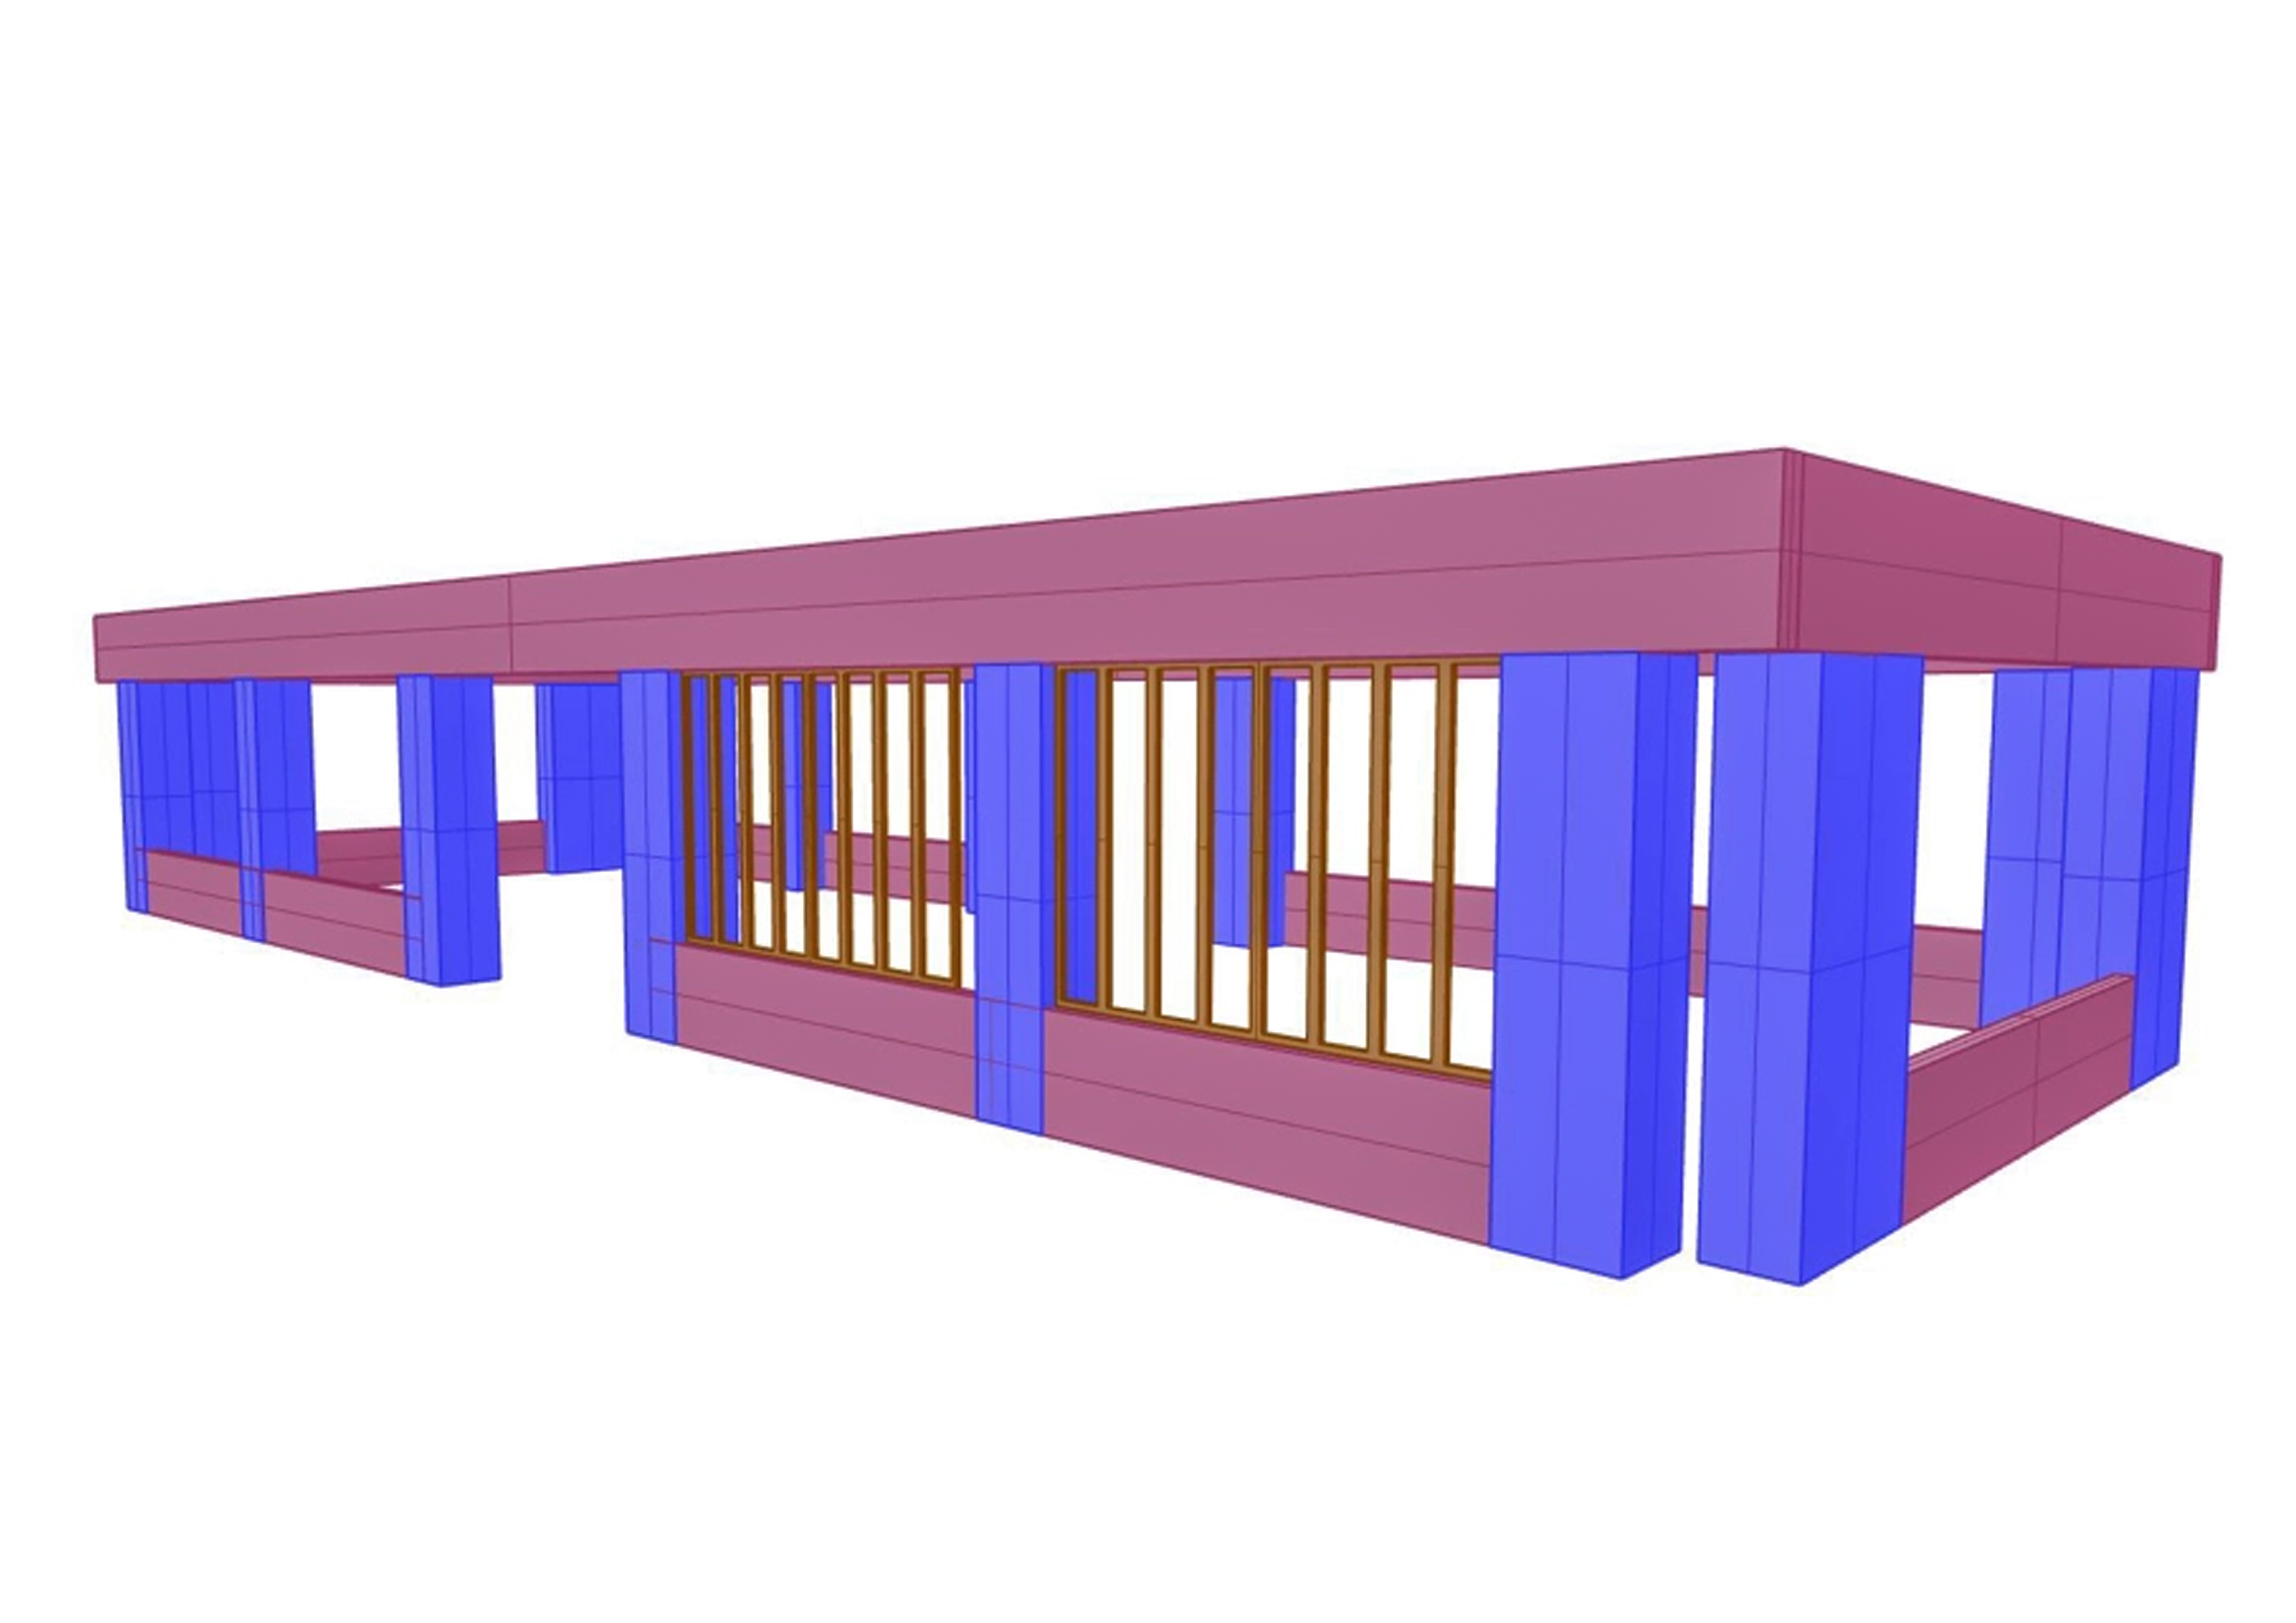
I chose to construct the panels out of aluminium because I wanted a strong structure that would not be altered by strong weather. This material will not corrode easily overtime and because of its reflective surface it would allow the light to bounce around and illuminate the space better. In the ideation stage, wood was another material I had consider however it did not provide a reflective surface and the laser cutting machine would have left black burnt residue on the wood.
I approached one of my professors to discuss the pivoting element of the panels. We concluded that the best way to achieve this was to firstly place the aluminium panels within a static steel structure to secure them. From the aluminium panel a steel bar would slot into a steel tube found inside a concrete block that would be placed underground. Each steel bar would have three bearings attached to ensure that when slotted into the steel tube we would reduce friction and allow smooth rotation.
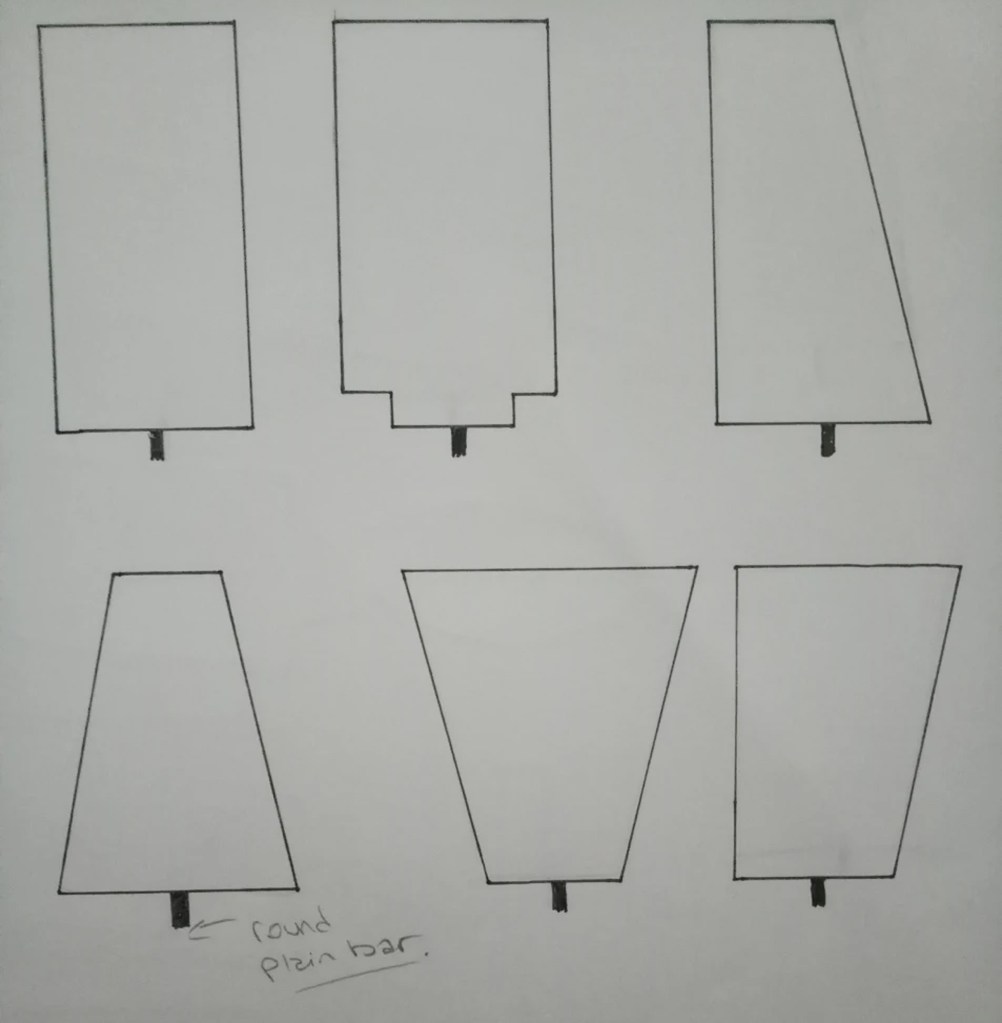
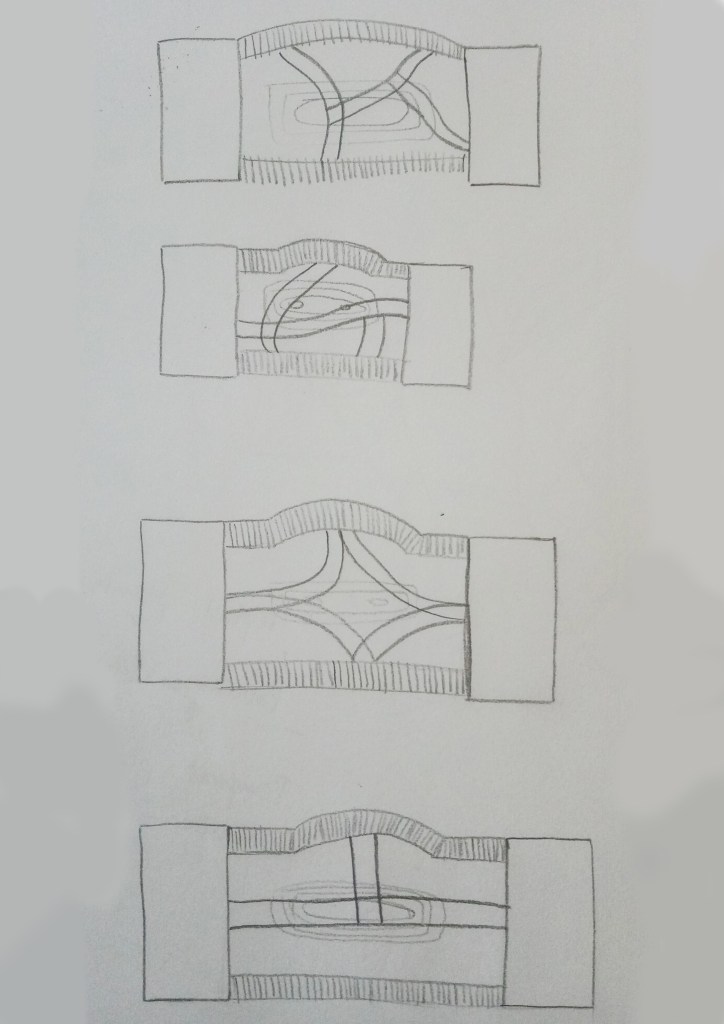
I sketched different panel shapes that could possibly work in the space. I finally opted for the top left panel shape and the two bottom left panel shapes to achieve maximum stability during rotation.
The panels would range in height of: 2400mm, 2000mm and 1500mm. For every panel a width of 1000mm and a depth of 60mm. The Fernery panels are the tallest, the Tropical panels are the second tallest and the Temporal panels are the shortest. I did this to mimic the actual height of the plants to represent them better.


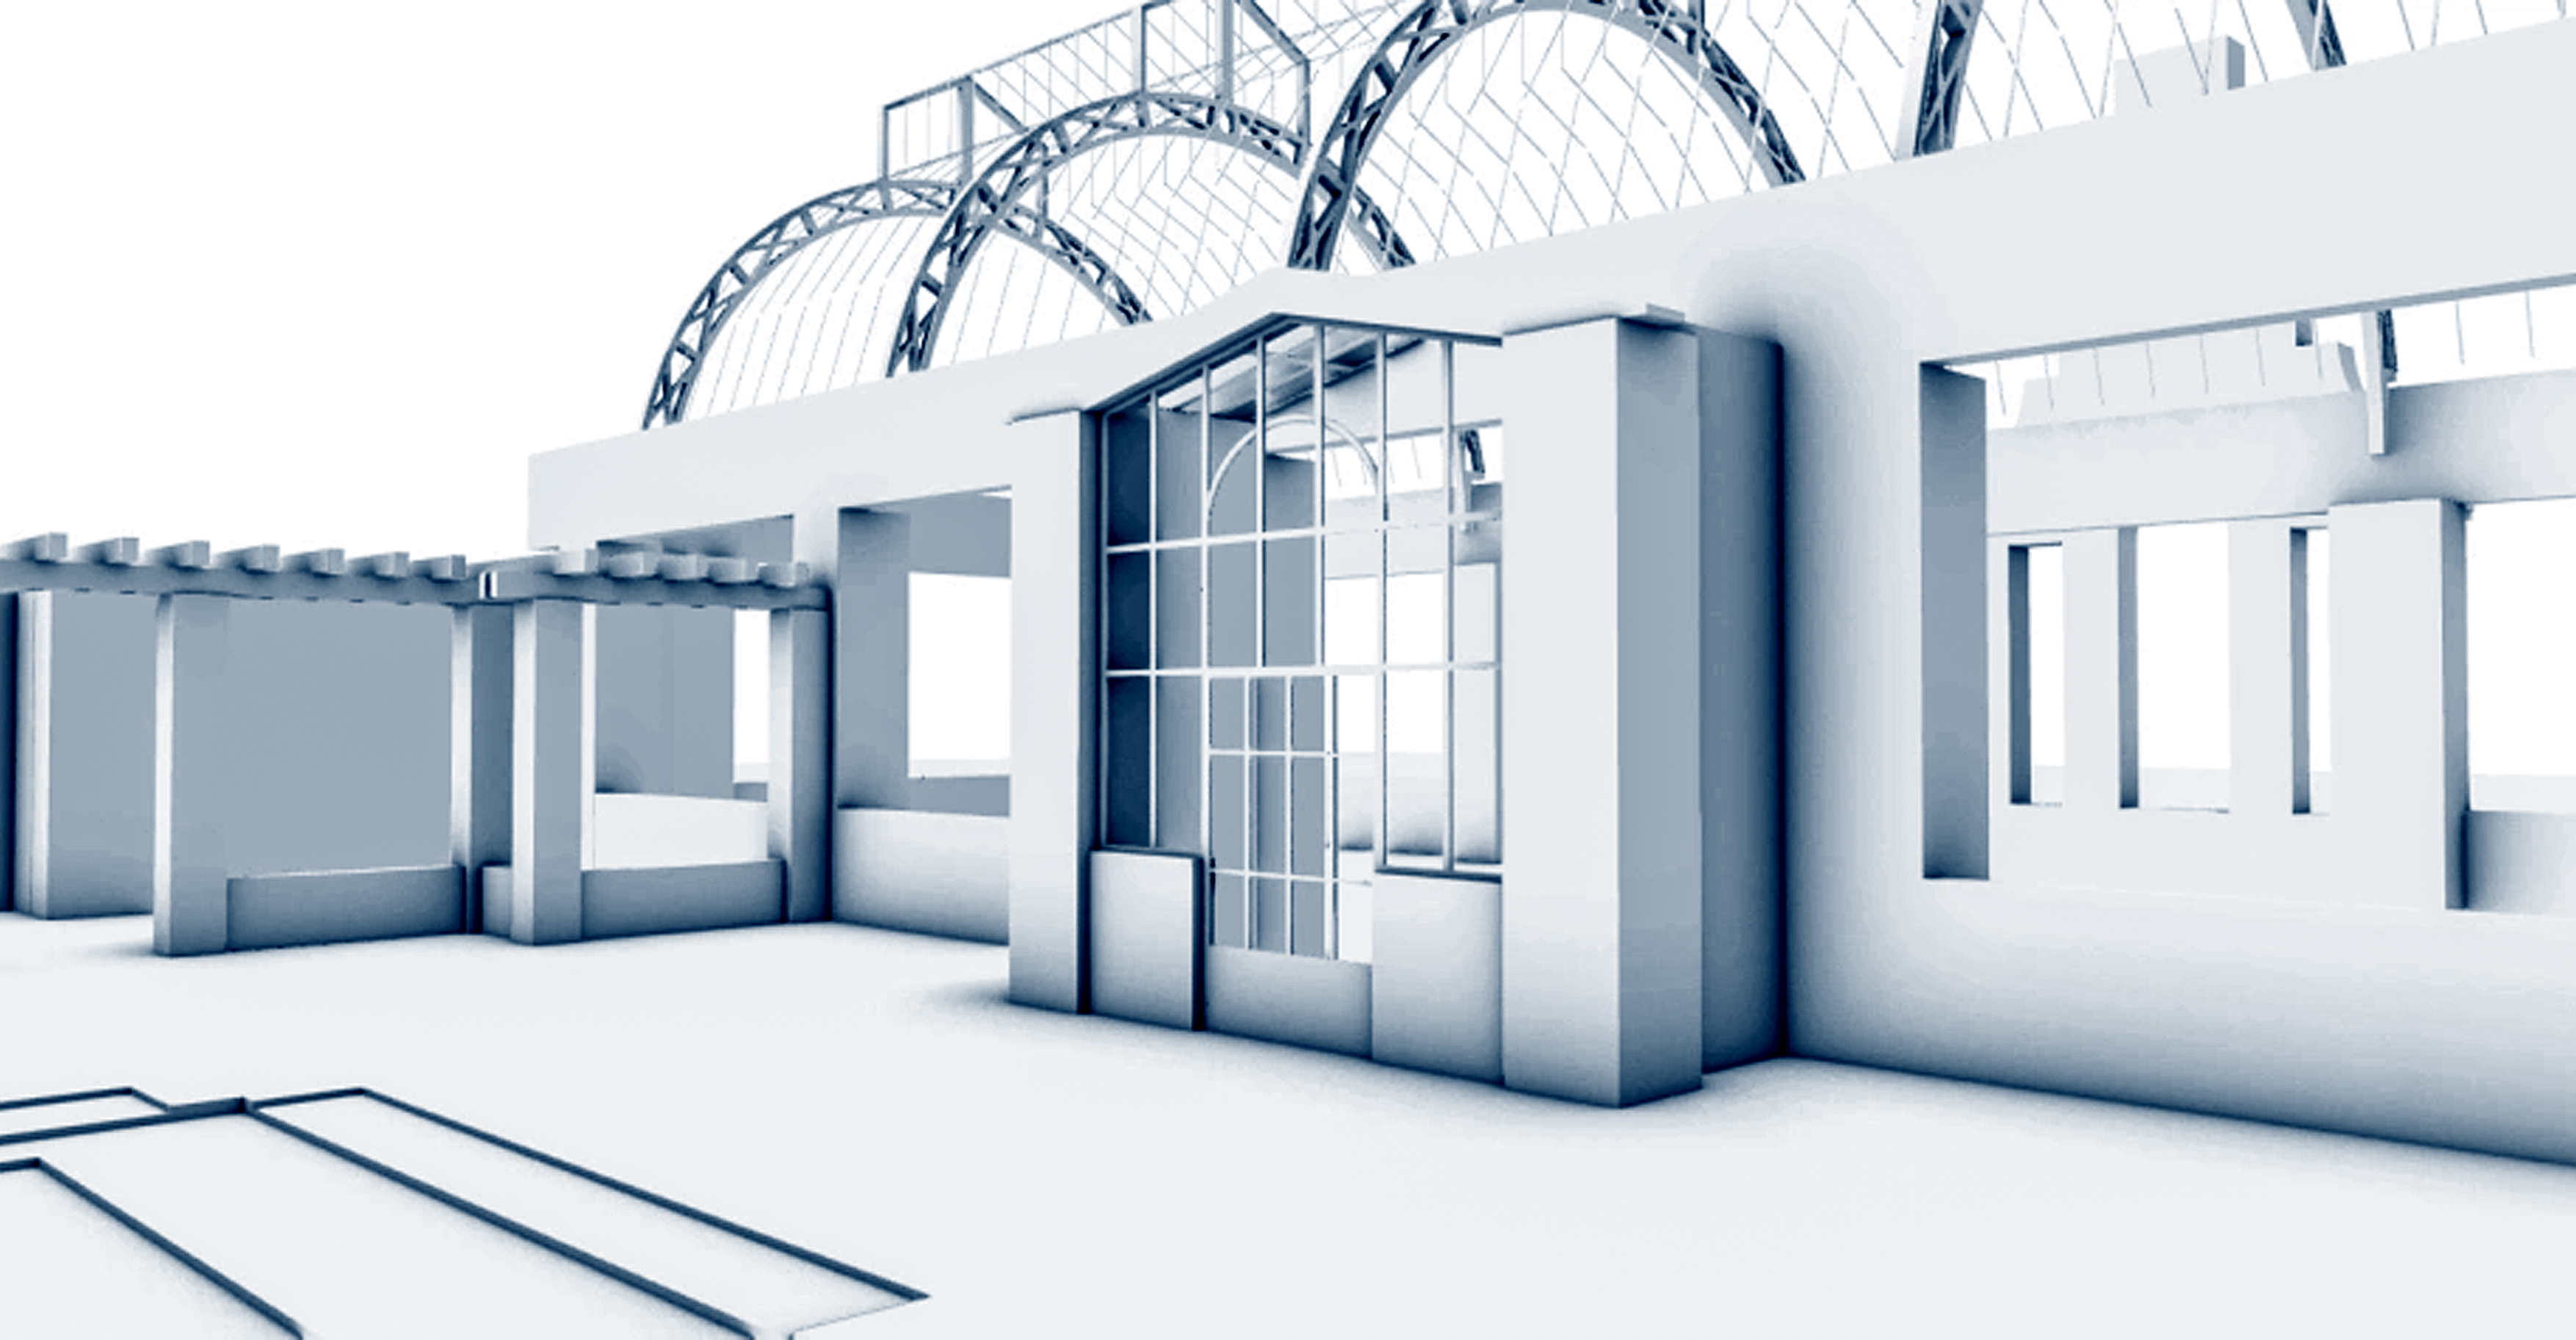
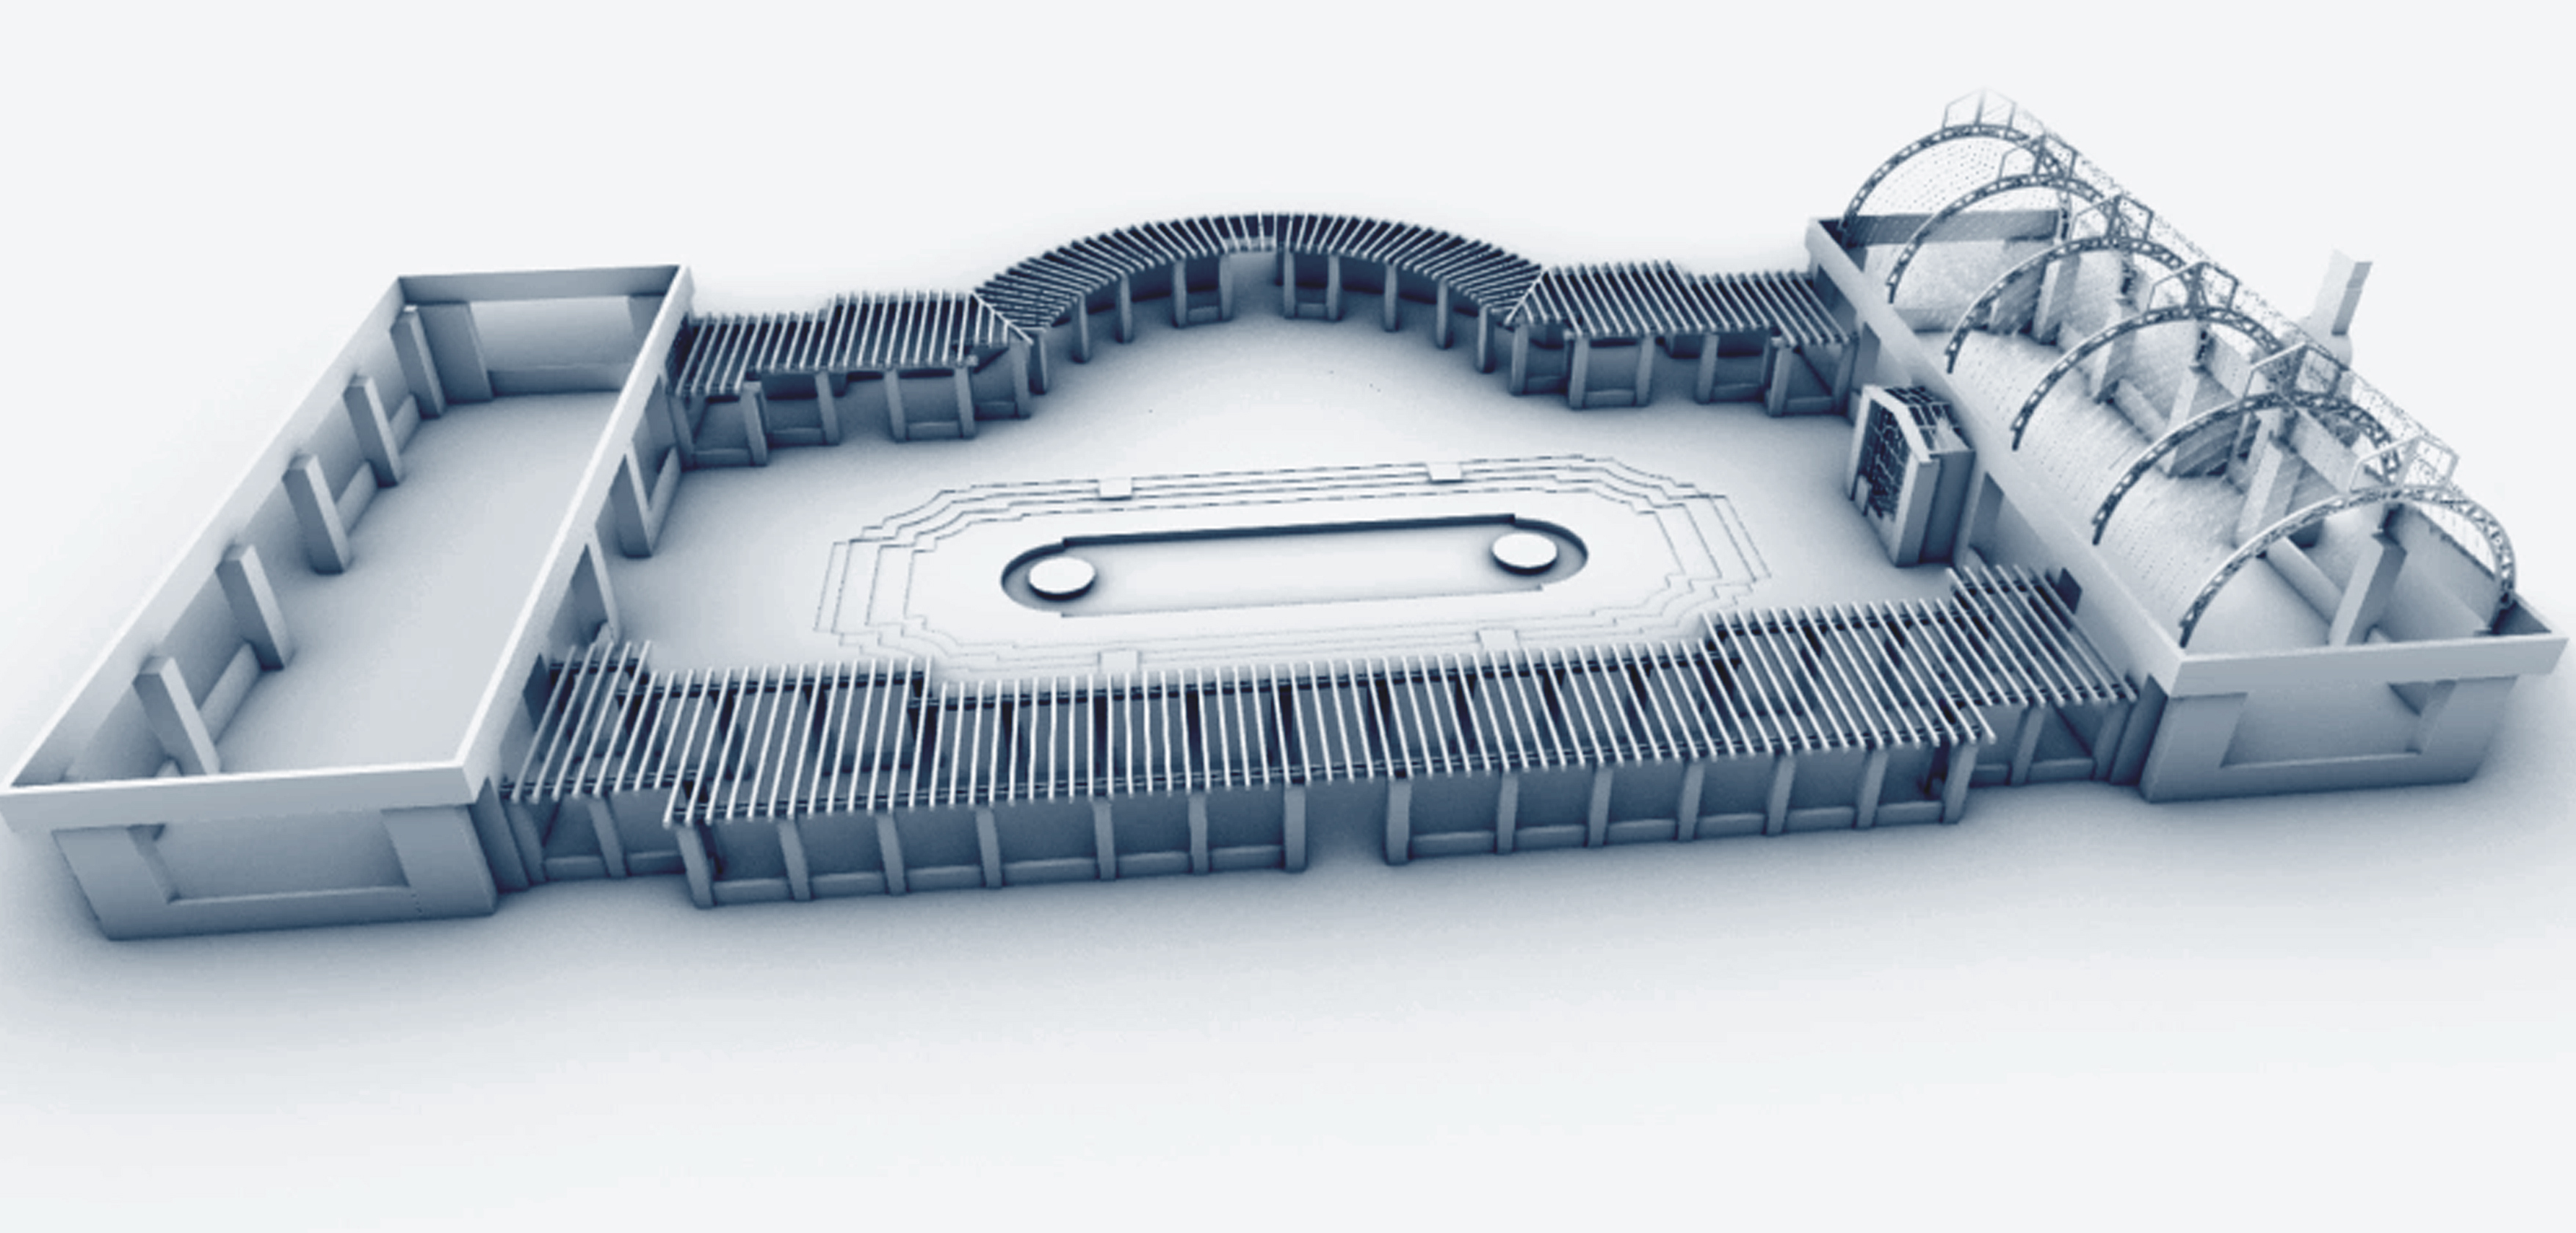
Winter Garden model making
Bellow are renderings of the winter garden that I digitally made using Revit and Rhino software. When making the basic structures for the two glass greenhouses I used Revit. But for the more detailed aspects of the garden like the fine roof frames, pergolas and rest of the courtyard I used Rhino.


Above are some sketches of the first panel ideas.
3D Lab Testing
In the early stages of these project, I visited the 3D labs which are different types of creative technology faculties that are available to design students to help them create iterative design work and 3D modelling.
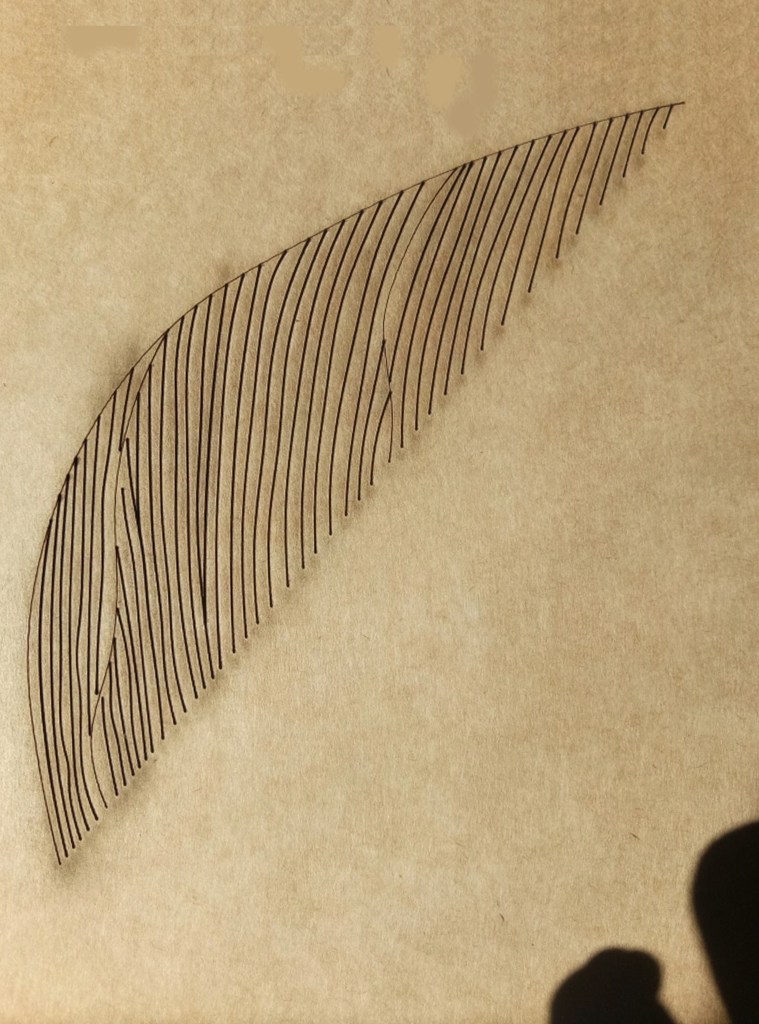
I was able to test out different machinery to carve out a simple pattern on a 150x165mm piece of wood. This simple test allowed me understand the ways in which I could manipulate a material and examine the way light passed through solid material with more detail.
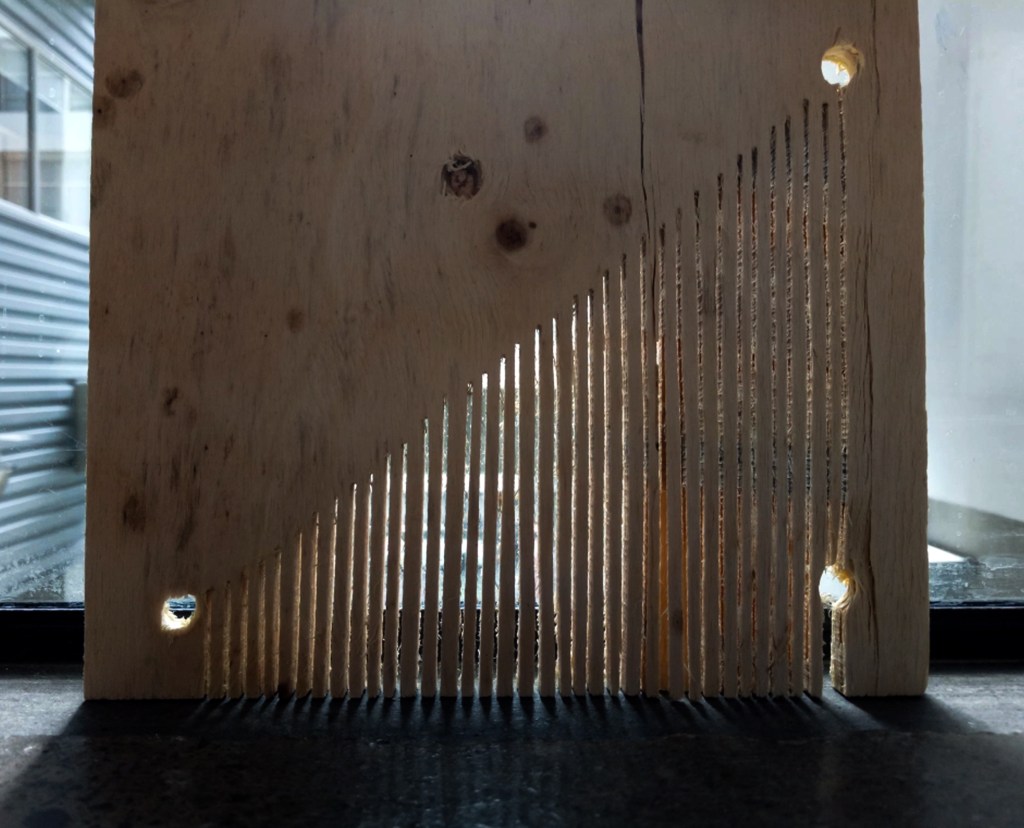
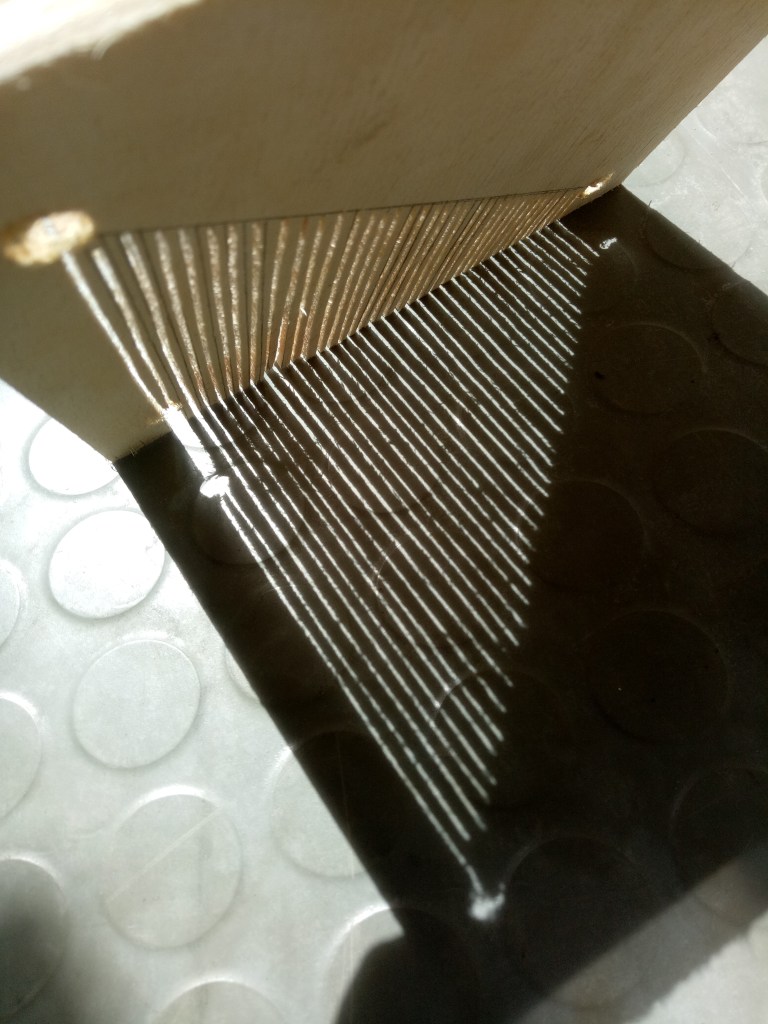

Another machine I tested was the laser cutter. This machine allowed me to carve more intricate line work with immense precision. I used Rhino software to digitally trace over a drawing of a tropical plant leaf and once the line drawing was complete then that file was opened in the laser cutter’s computer. The leaf pattern was lasered cut next to the previous piece of wood.
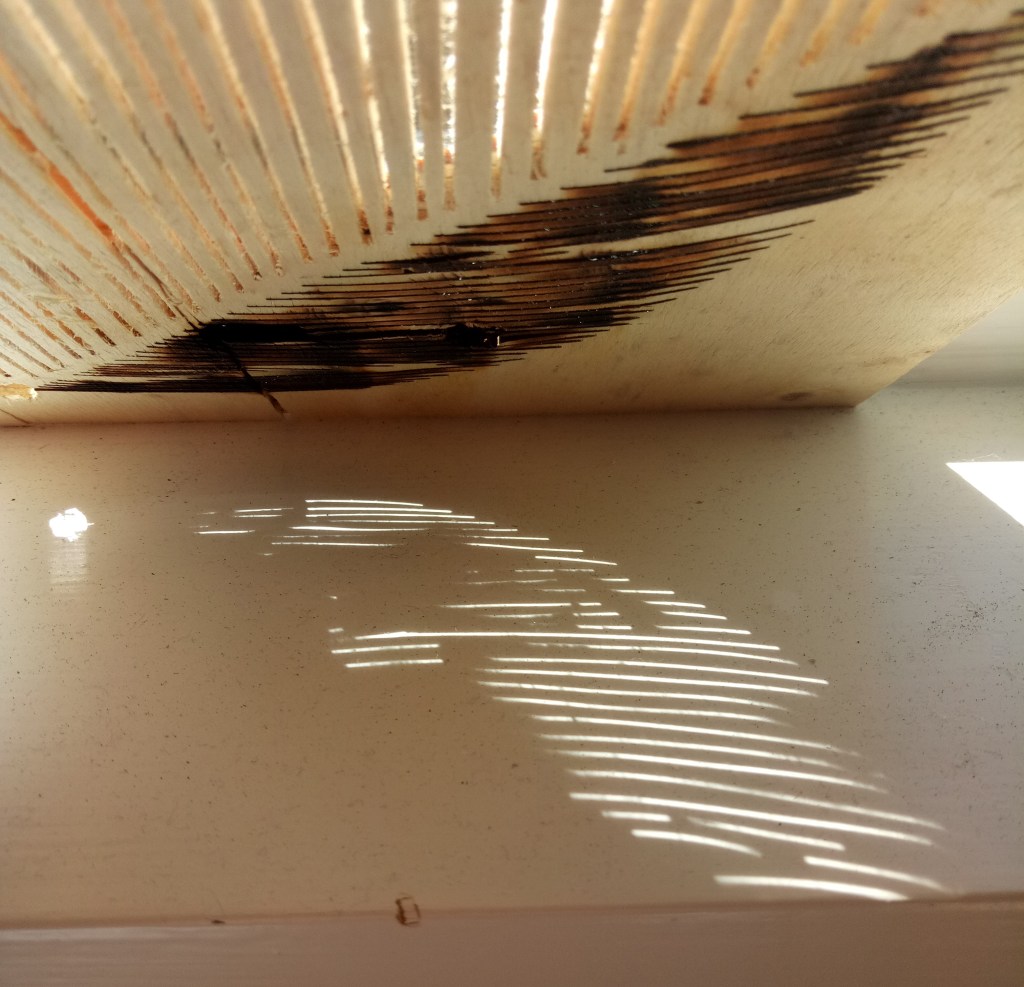
The finer-line work achieved with the laser allowed the light to be revealed more gradually and the shadows to be softer and more delicate. I become fascinated with the way the shadows cast would expand and curve against any surface, as if the shadows were a living organism that breathed and grew. The completely transformed the empty space.

Site Visit
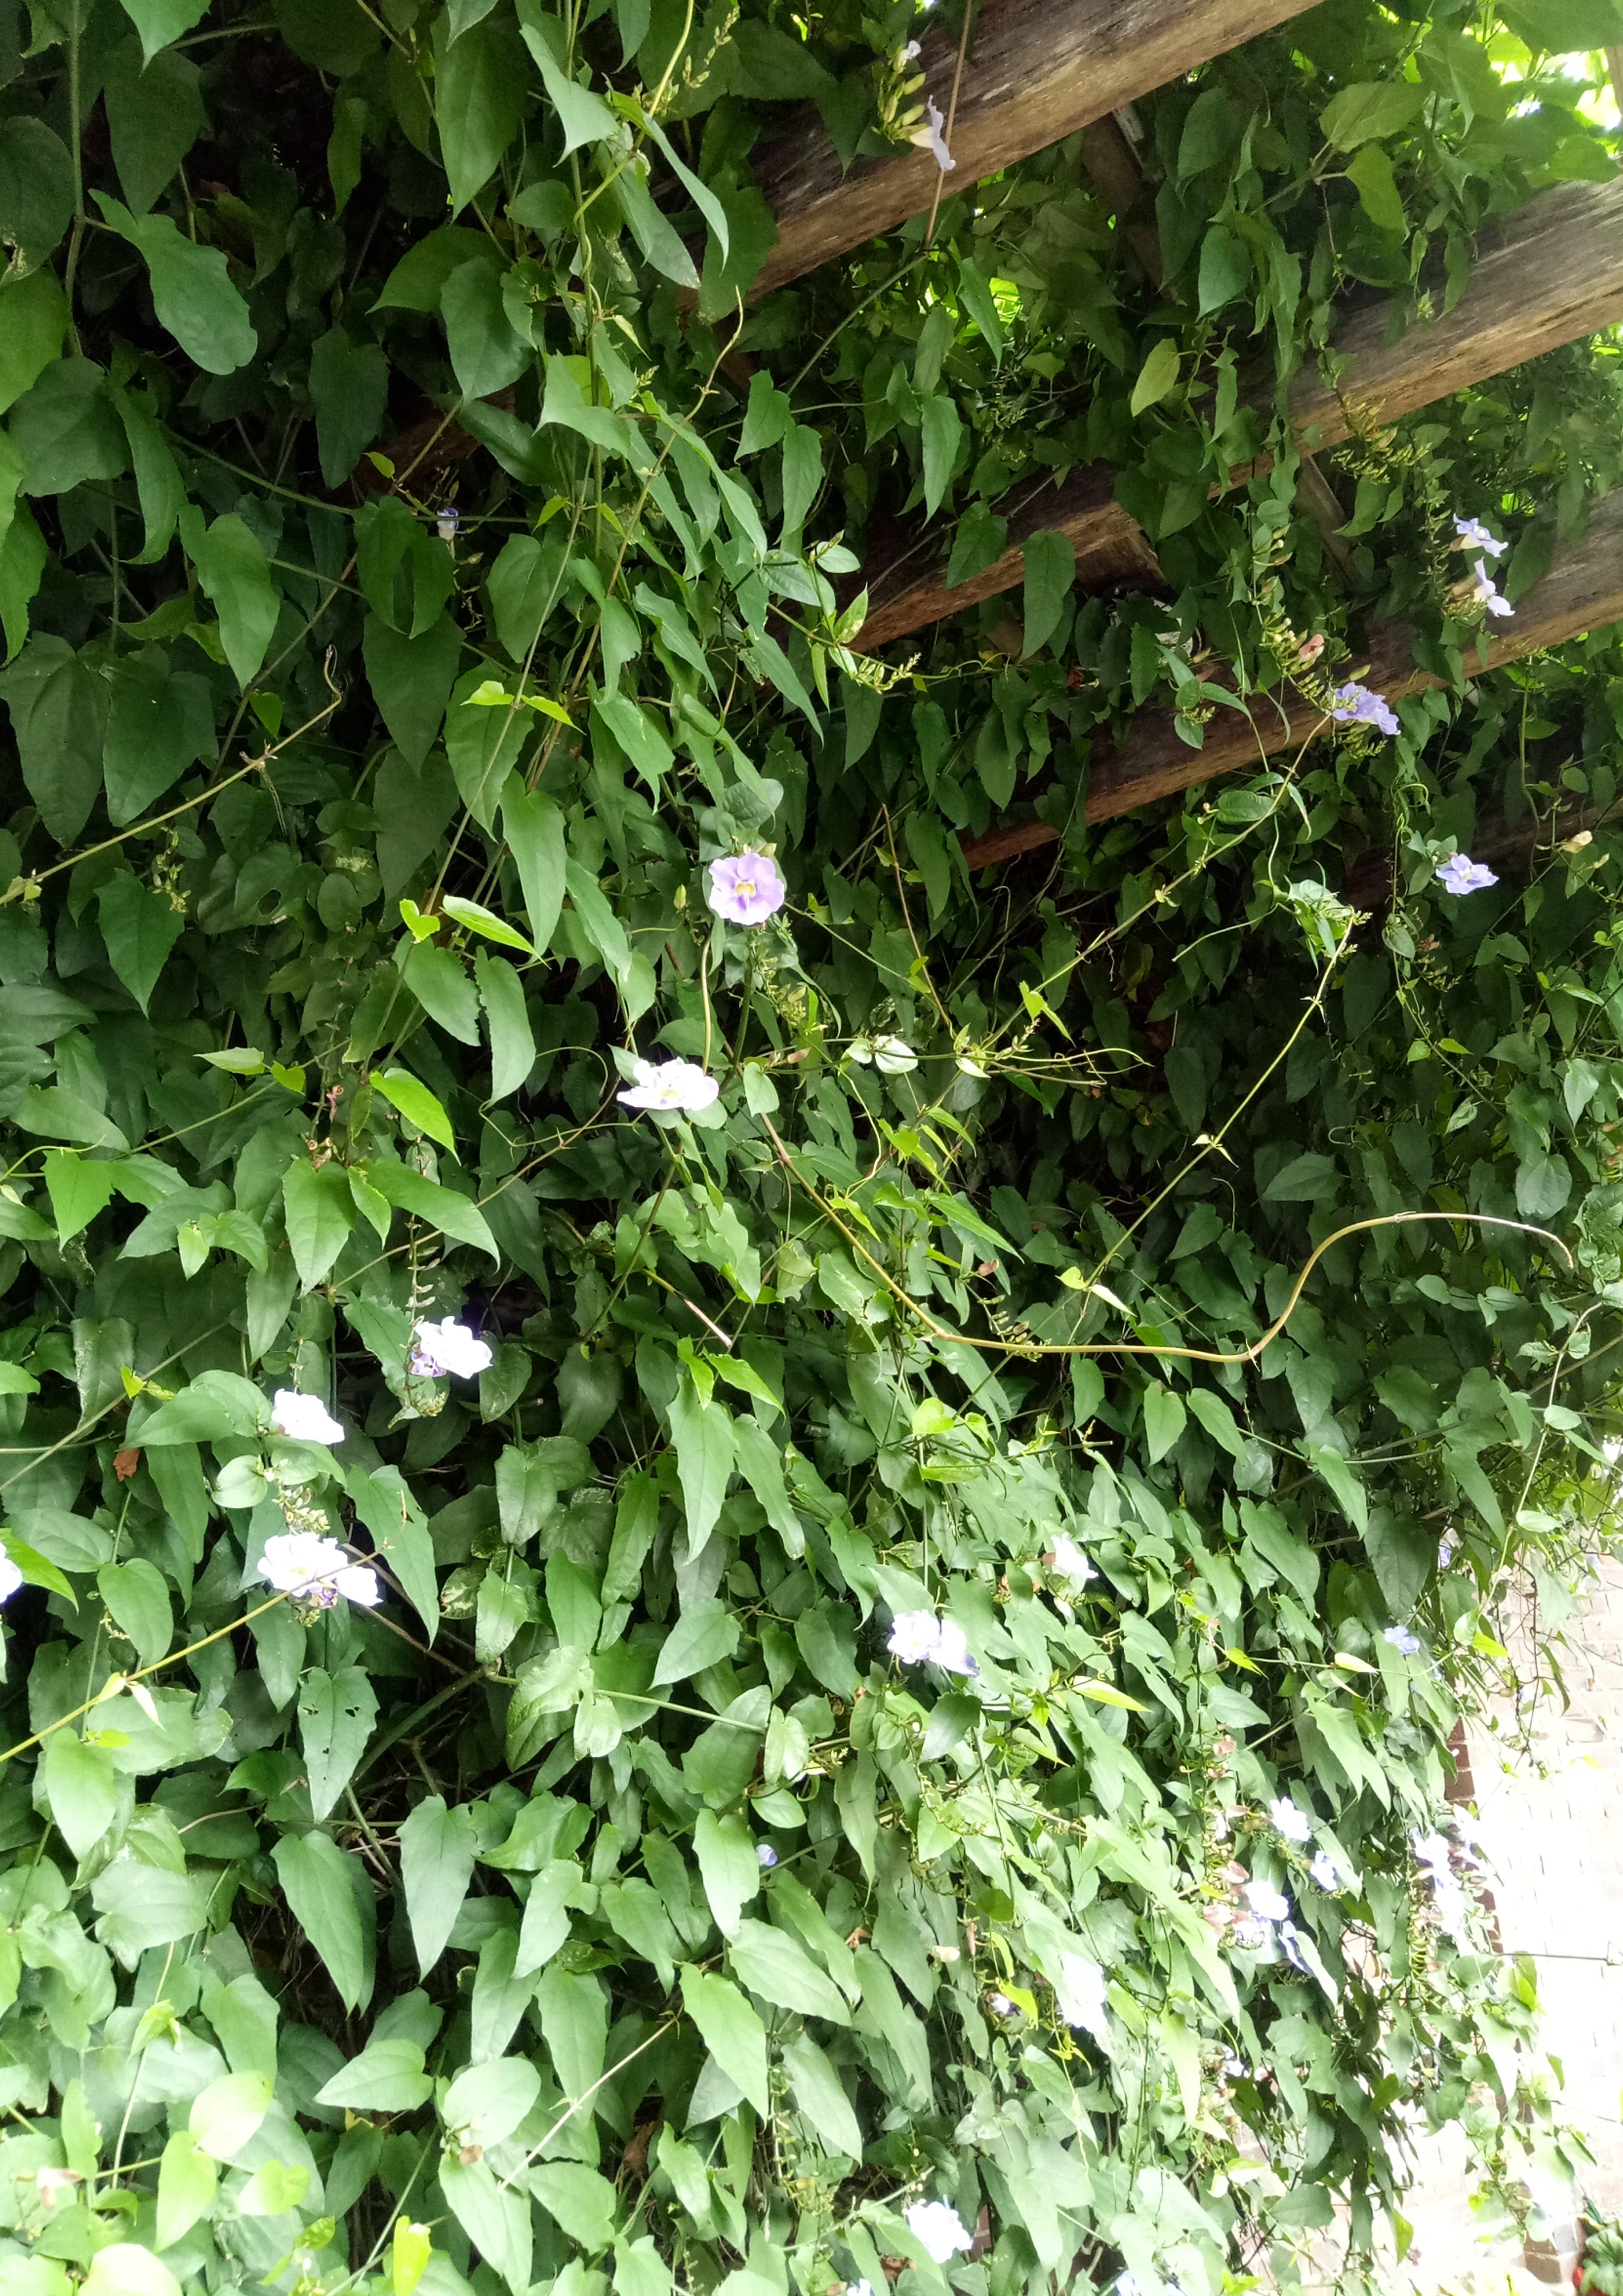
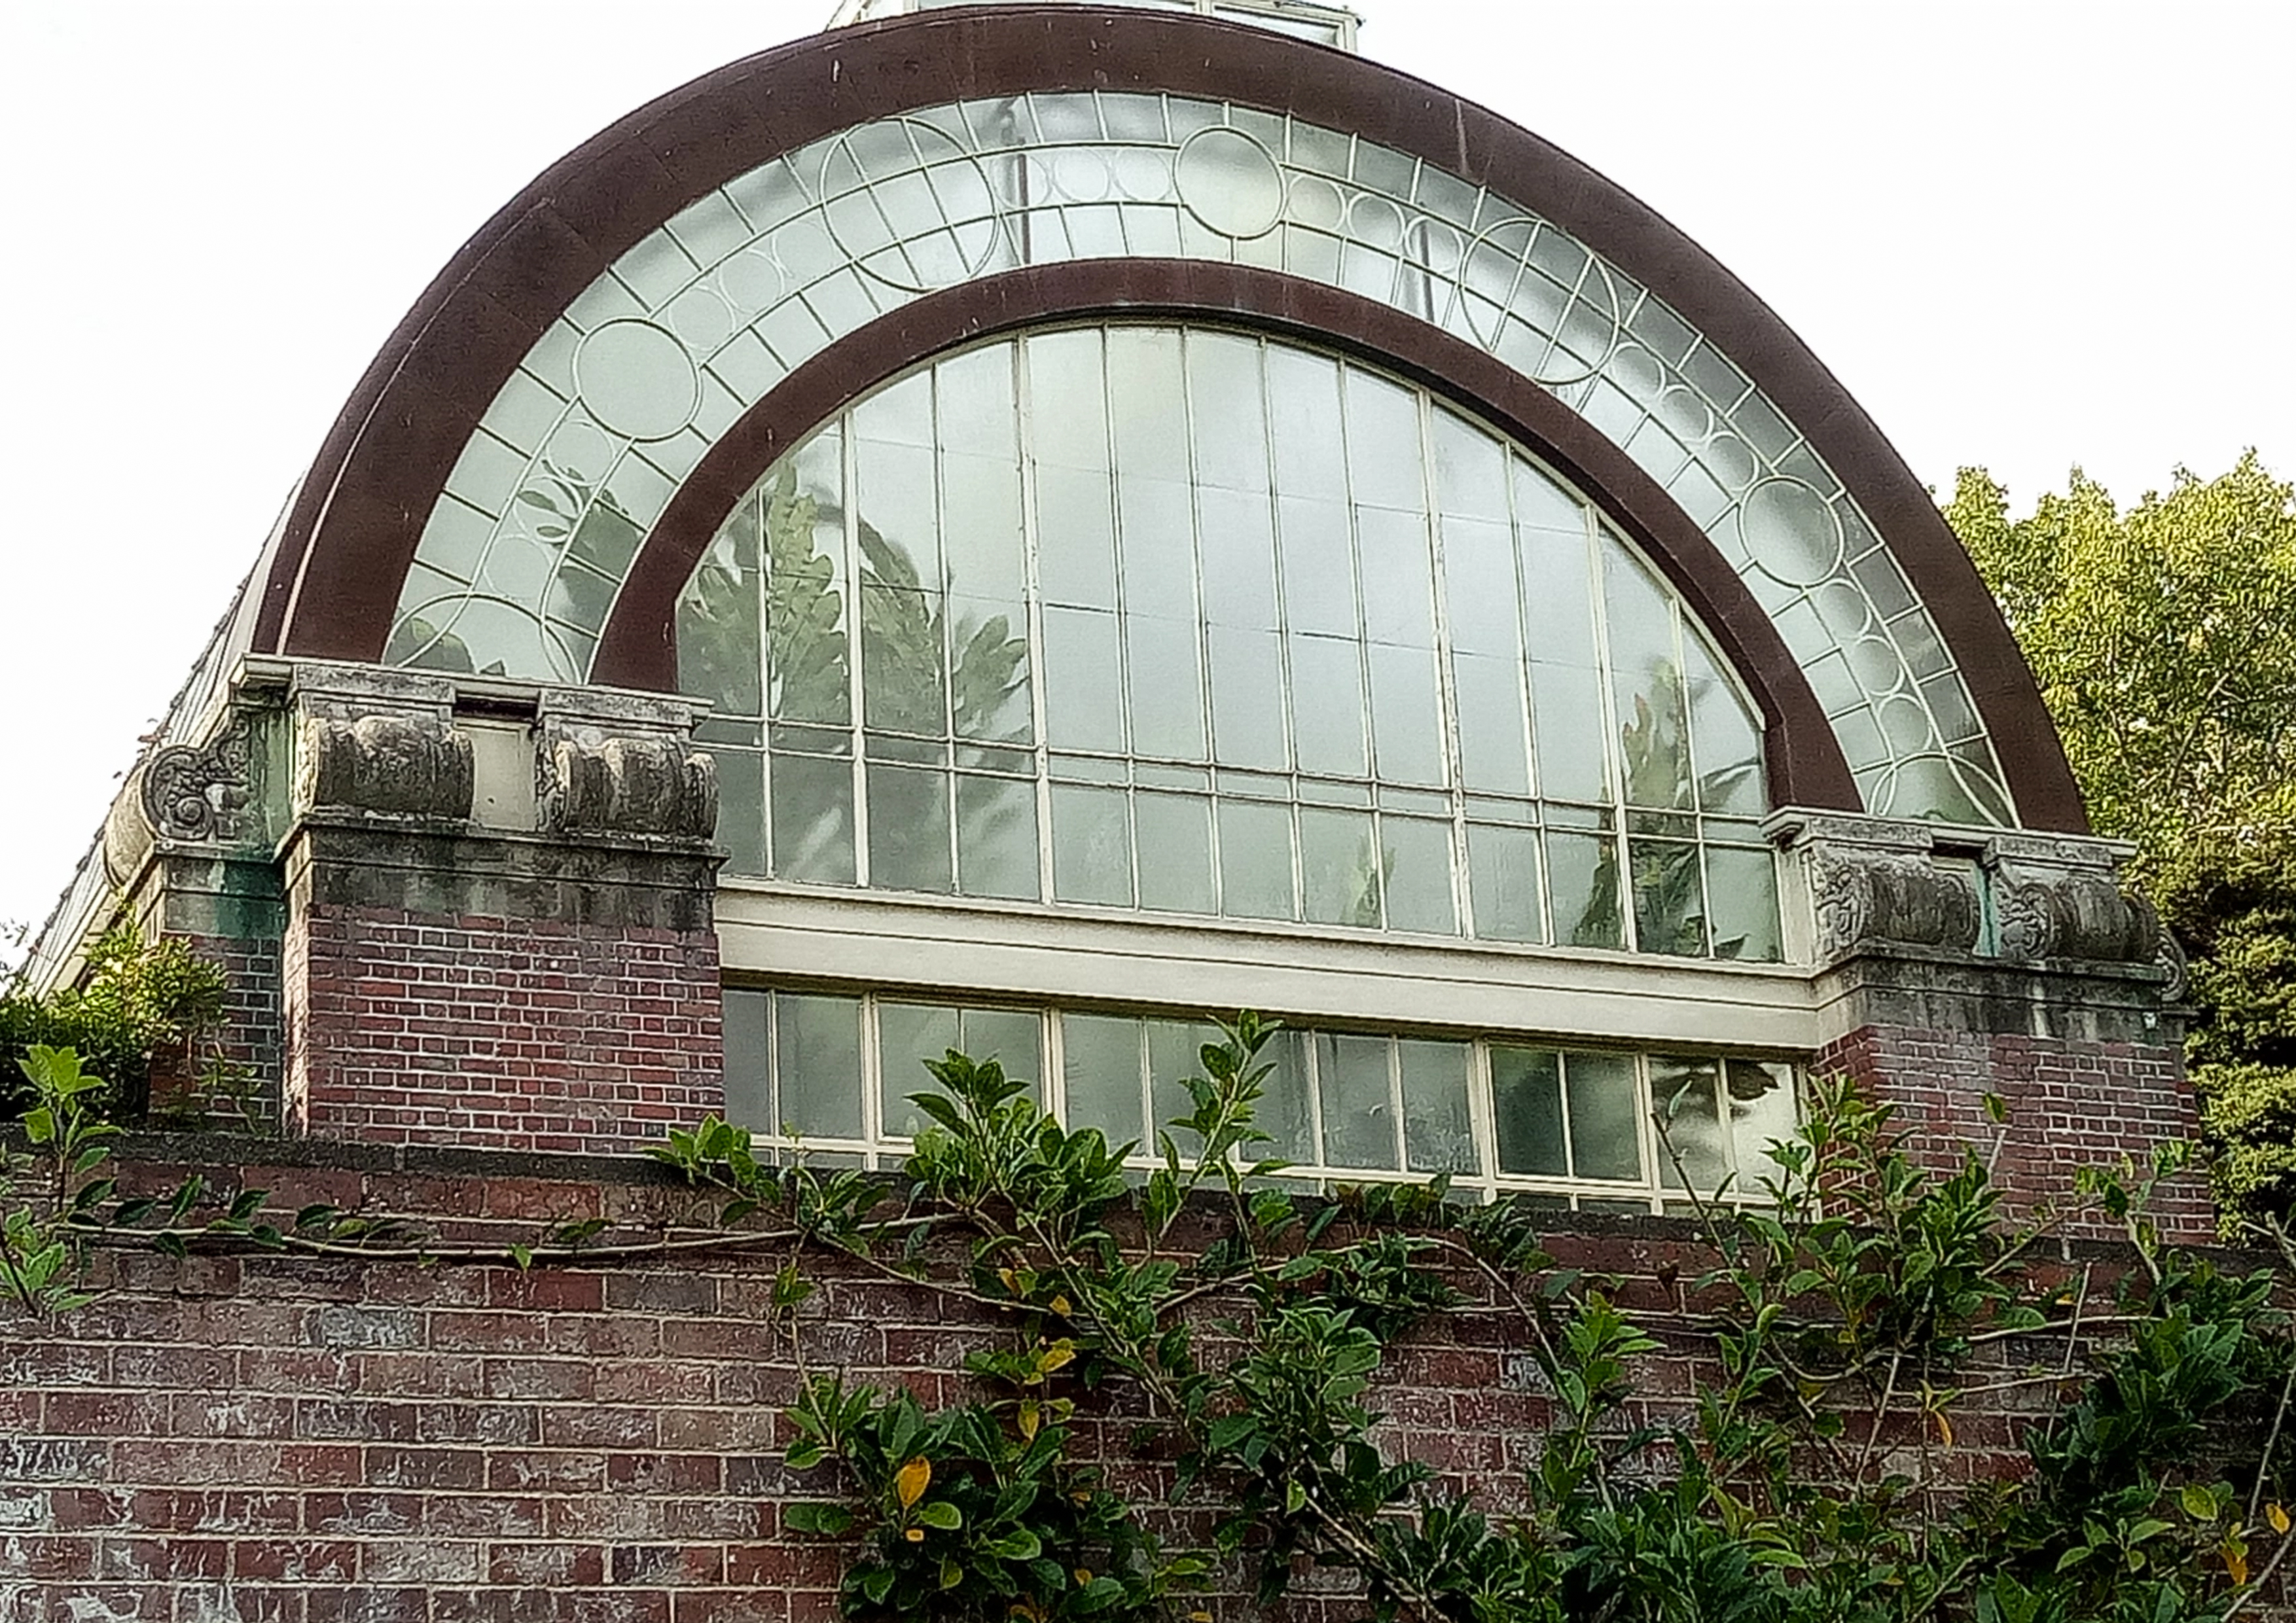
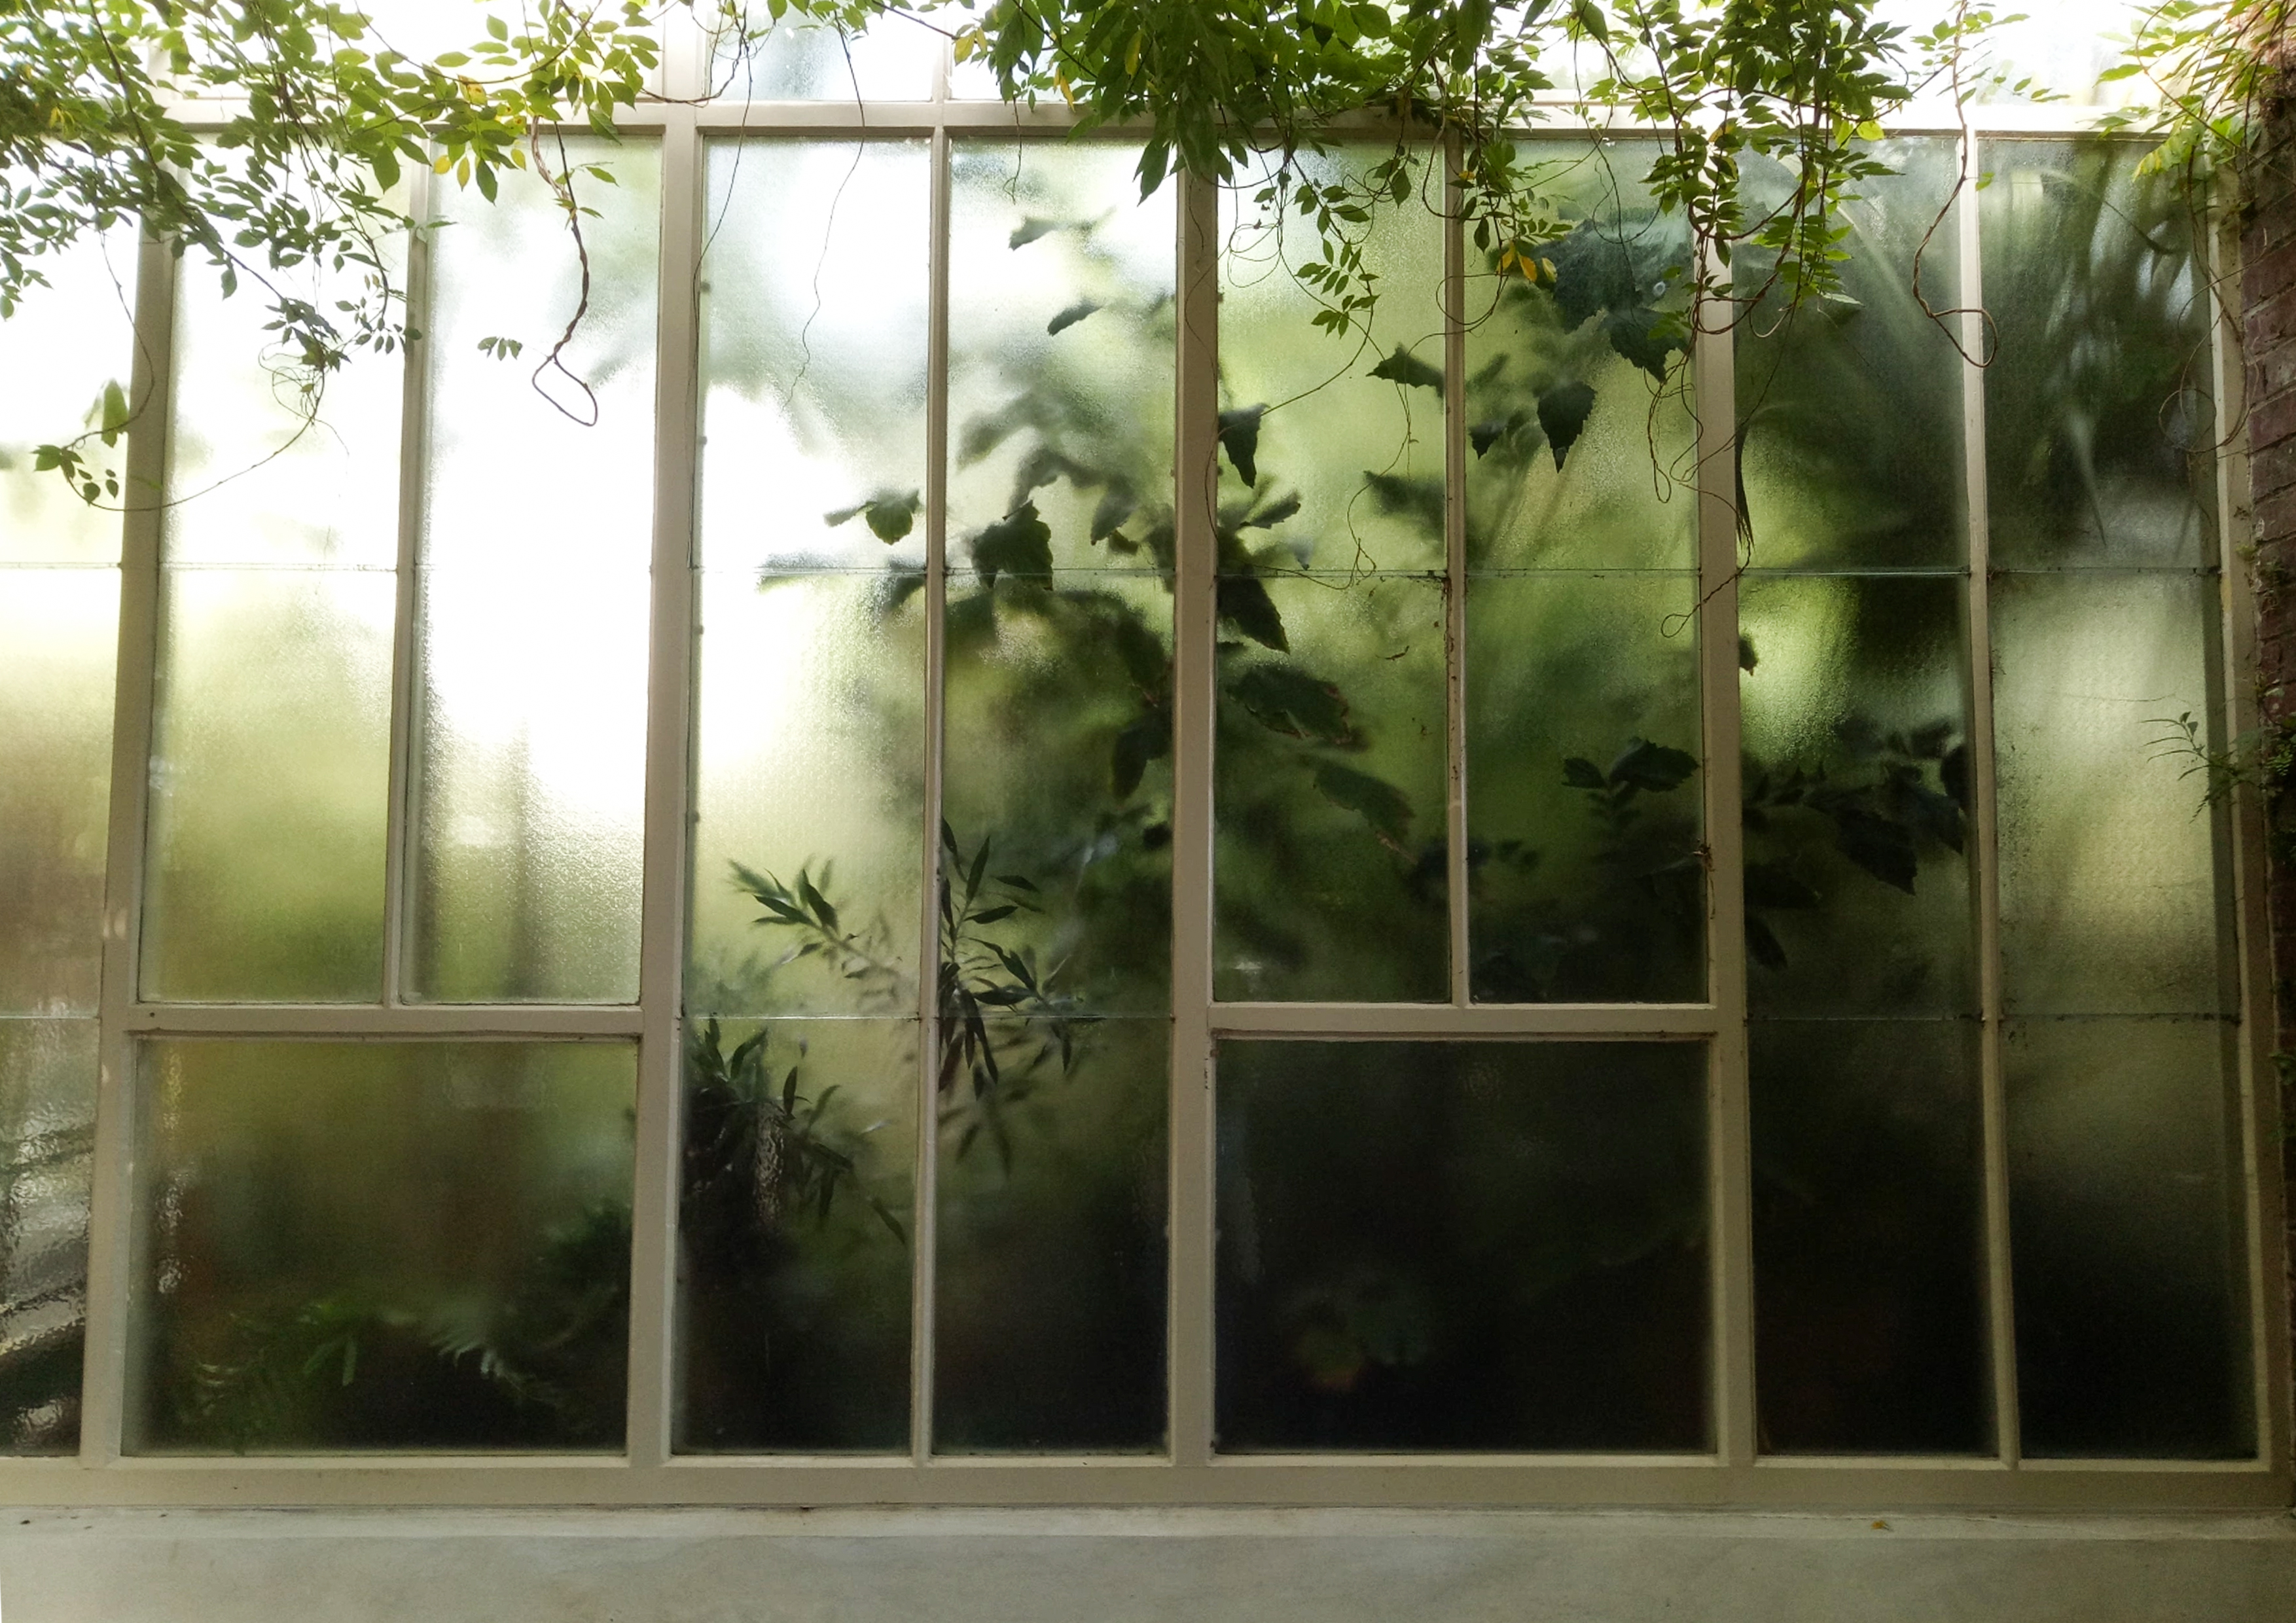

When I visited the winter gardens, there were two aspects of the site that caught my interest. Firstly, how the plant-life appeared constraint in their space forcing them to push against their surroundings. While the second thing was the environment created by the shadows cast by the pergolas – as if hugging the plant-life creating privacy and comfort. Seeing the restricted environment in which they plants existed, it triggered within me a desire to free them in some way. This desire was the seed that gave life to my project.

Leave a comment